• Snag some vintage SPL team logo merch over at our Teespring store before January 12th!

BDSP Battle Tower Discussion & Records

That's a nice starting point! My immediate thoughts:

1) Suicune is great, but it must have Rest. With Rest, it can set up on a large portion of the tower, as well as status users. Use it over Roar.
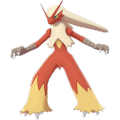
2) Blaziken is pretty poor lead imo, because there are a ton of pokemon it simply can't beat (even after SD). Fire/Fighting coverage simply isn't good enough. I'd replace it with Dragonite or Garchomp, two of the best sweepers out there. Do you have any of those available (Adamant dragonite, jolly garchomp?)

Hey! At first, thanks for the answer :)
I think Rest improves Suicune quite a bit, with Roar i reset the mons that were boosted, but it's a good switch. Regarding Dragonite, what configuration would you put on it? I just finished fight 21, I'm on time to change hehehe
 
Hey! At first, thanks for the answer :)
I think Rest improves Suicune quite a bit, with Roar i reset the mons that were boosted, but it's a good switch. Regarding Dragonite, what configuration would you put on it? I just finished fight 21, I'm on time to change hehehe
Dragonite @ Lum Berry
Ability: Multiscale
EVs: 4 HP / 252 Atk / 252 Spe
Adamant Nature
- Dragon Dance
- Outrage
- Earthquake
- Roost / Thunder Punch / Aerial Ace / Fire Punch

Notice the ability. If you can't get a multiscale one, don't use it.
 
Last edited:
Dragonite @ Lum Berry
Ability: Multiscale
EVs: 4 HP / 252 Atk / 252 Spe
Adamant Nature
- Dragon Dance
- Outrage
- Earthquake
- Roost / Thunder Punch / Aerial Ace / Fire Punch

Notice the ability. If you can't get a multiscale one, don't use it.
Thx a lot! :))
I'm trying to do my best with Garchomp and writting down the strategys, but when i have to deal with Clefable..... xdddd
 
Thx a lot! :))
I'm trying to do my best with Garchomp and writting down the strategys, but when i have to deal with Clefable..... xdddd
You can try scizor as the last one, with swords dance garchomp as the lead. Set: SD / Roost / Bullet Punch / a coverage move. It deals with togekiss and clefable

edit: Or did you mean you're trying a team of Dragonite / Suicune / Garchomp? If so, I'd use focus sash garchomp in the back.
 
I am using Garchomp/Latios/Suicune. So far I'm doing fine, but Clefable and some other Cresselia, it's making me sick. I don't know if putting Scizor in would break the rest of my strategies. I'm scared haha
 
I am using Garchomp/Latios/Suicune. So far I'm doing fine, but Clefable and some other Cresselia, it's making me sick. I don't know if putting Scizor in would break the rest of my strategies. I'm scared haha
Latios doesn't fit into that team. No setup potential, and no defensive synergy. Scizor would definitly be better imo, and it also hard-counters the two threats you mentioned.
 
EDIT: This post was originally written under the assumption that a HOME update was going to enable transfer-only moves in BDSP. Please see the follow-up post here for an up-to-date version of the team!

Here's an ongoing Master Class Doubles streak of 203. As mentioned on Discord, the streak will continue after a HOME update makes Gravity Bronzong legal. The required video proof will be submitted in a future post after the streak ends.

bronzong.gif
hariyama.gif
snorlax.gif
octillery.gif


Pokepaste

*********************
Teambuilding:

The original plan featured Dusknoir as the Trick Room setter. ILCA dropped an update right before I could evolve my Dusclops, and since I was nowhere near done with duplicating important items (breeding with BDSP's controls is pain), I decided to ditch the cyclops and went with Bronzong instead.

Not fully knowing what to expect from BDSP's rendition of the tower, I defaulted to one of the tried-and-true templates for the backline: a single-target attacker paired with a spread move user, with ideally one being physical, and the other special based. Additionally, I wanted a Fake Out user to ensure TR going up. Looking at the limited roster, Hariyama felt like the most obvious choice. Importantly, it learns Knock Off as a level-up move, instead of it being a 7th gen tutor exclusive.

Torkoal was a strong contender for a spread move user, but lacking Earth Power (and to a lesser degree Weather Ball) tipped the scales in favour of Octillery, who has its full kit readily available in BDSP. Bronzong's lack of transfer-only moves (such as Ally Switch and Speed Swap) also helped justify using Rain Dance as a supporting move.

The amount of hax present made a glass cannon seem like a terrible idea for the final mon, so I went for the absolute unit that is Snorlax. Unlike Octillery, its bulk lets it comfortably tank weaker neutral hits. As a bonus, Snorlax's typing comes in handy occasionally, letting it switch in on Ghost-type moves aimed at Bronzong.

The end result is a fairly standard Trick Room team, although with all of the sweepers running four attacks. The first attempt with the team made it to 141 wins, with the loss being an absolute throw against one of the weakest rosters in the entire tower, Layne & Noelle (Layne: Wailord-2, Yanmega-2 & Noelle: Cresselia-5, Kangaskhan-2). Turns out autopiloting is bad, and while clicking Knock Off on a Leftovers Cresselia would usually be fine, missing the opportunity to KO Wailord was a costly misplay. Feeling disappointed with the way the streak ended, I immediately headed back in, adamant on getting closer to the goal of 200 wins. At the time of writing, Ellis & Irene have graced the second (current) streak with their presence three times, the first of said encounters being literally battle #1. Whether such a warm welcome was a blessing or a curse remains to be seen.

Bronzong, Hariyama and Snorlax would receive minor adjustments throughout the runs, most of which are detailed in each mon's individual sections below.

*********************
The team:

Advertising the team as plug-and-play would feel dishonest, despite how straightforward the sets are. While not running Protect or setup moves streamlines battles, simply clicking the strongest attack rarely results in the safest possible script for each matchup. Knock Off and Fake Out in particular break the mold, with the former's item-removing effect sometimes being preferable to dealing maximum damage with Close Combat. Fake Out's target priority is commonly measured based on the enemy's ability to deny Trick Room, rather than their raw damage output. It's normal to stop a weak Ice Beam from freezing Hariyama on the first turn even if doing so allows the other enemy to deal more damage.

Knowing the enemy backlines from the get-go enables a playstyle that would have been much riskier in the previous facilities. While Hariyama teams normally gain value from preserving it for later (through resetting CC's stat drops, or gaining a second Fake Out), this particular team rarely switches it out. Water Spout's HP-dependent damage output means that the wincon often hinges on Octillery coming in unscathed, and trading Hariyama is a good way of ensuring a safe entry for the backline. In short, rather than create advantageous matchups through switching, Hariyama often stays in until it falls, making way for Octillery and Snorlax to snowball out of control. For anyone who's tried it before, the momentum is reminiscent of that of Gigalith boomroom.

Some matchups require a fair amount of planning in order to consistently win. Bulky opponents will have you calcing different combinations of attack rolls, slowing the pace of climbing the ranks. Toggling Hariyama's status to see Fake Out's damage numbers gets tiresome, but the worst offender is Octillery. Having to manually fiddle with HP values after taking even the slightest amount of chip damage can be very time-consuming. Add in Rain Dance and the possibility of removing the split damage penalty by isolating a single opponent, and the number of plays to consider increases significantly.

Despite all of this, I wouldn't describe this squad as some kind of an expert team, where you have to be a god gamer to win. As always, keeping notes for each matchup will help a lot. Being able to look up scripts will expedite future rematches, and reduce chances of misplays caused by absent-mindedness.

*********************
Bronzong @ Lum Berry
Ability: Heatproof
EVs: 236 HP / 124 Def / 148 SpD
IVs: 0 Spe
Sassy Nature
- Trick Room
- Gravity
- Rain Dance
- Gyro Ball

The plethora of strong Fire-type attacks from Typhlosion, Houndoom, Heatran, Moltres, etc. cement Heatproof's status as the superior ability in BDSP's tower. Losing the Ground-type immunity is a worthwhile trade - Earthquakes will rarely OHKO, and any EQ (or Earth Power) that could do so can be stopped with Fake Out. The sole exception to this rule thus far is lead Donphan-3, which appears as a lead on only one set of opponents, Aldo & Blair.

Heatproof's usefulness is based purely on it allowing Bronzong to set TR in the face of opposing Fire-types. Halving the damage from attacks that would normally fry Bronzong (such as Moltres-3's Overheat) greatly reduces the number of lead matchups where Bronzong would be in danger of dying to a single critical hit.

In the absence of mass calc tools, a Gengar-3 Shadow Ball crit was used as the benchmark for special attacks, with the remaining EVs going to Defense. This turned out to be a decent "balanced" spread, although a run-in with a lead Absol-3 forced moving a few EVs from the then-maxed HP to Defense later on. Bronzong's EV spread together with Hariyama's gives opposing Download users an Attack boost, which is very important in the case of lead Porygon-Z-2.
252 SpA Gengar Shadow Ball vs. 236 HP / 148+ SpD Bronzong on a critical hit: 146-174 (84.8 - 101.1%) -- 6.3% chance to OHKO
(146, 146, 150, 152, 152, 156, 156, 158, 158, 162, 164, 164, 168, 168, 170, 174)

252 Atk Absol Night Slash vs. 236 HP / 124 Def Bronzong on a critical hit: 144-170 (83.7 - 98.8%) -- guaranteed 2HKO
(144, 146, 146, 150, 150, 152, 152, 156, 158, 158, 162, 162, 164, 164, 168, 170)
Some of the more keen-eyed readers (playing fake streak bingo, perhaps?) may notice that the current spread lives through the aforementioned Gengar-3 Shadow Ball crit only 15/16 (~93,7%) of the time. A guaranteed survival would have skewed the EV spread even more heavily towards SpD, and since I was more or less going in blind, the calc felt good enough to begin the streak with. Gengar-3 shows up as a lead on only two of the possible opponents.

The usual go-to attacking moves, Iron Head and Body Press, are unavailable in BDSP. That being said, Gyro Ball hasn't felt like much of a downgrade - it scores delightful OHKOs on certain fast and frail mons like Alakazam and Froslass. It also has good odds of 2HKOing some other speedy sweepers, such as the Latios and Porygon-Z sets.

Gravity is unavailable at the time of writing, with the hopes of the HOME update happening anytime soon requiring increasing amounts of copium. Having access to a 5/3 accuracy boost will solve some, but not all problems. Double Team users, such as Zapdos-1 and Ludicolo-2 will no longer be as threatening. At the same time, Gravity doesn't help with landing Fake Out on some of the most dangerous Bright Powder leads, such as the Sheer Cold Articuno and Walrein sets.

For clarity's sake, Bronzong ran Protect in Gravity's place until battle #203. That being said, Protect was purposefully never used, the logic being that it wouldn't be wise to rely on a move that was 100% getting replaced later on. Thus, Protect should be considered a placeholder, and by no means an optimal fourth move.
*********************
Hariyama @ Flame Orb
Ability: Guts
EVs: 252 Atk / 164 Def / 92 SpD
IVs: 0 Spe
Brave Nature
- Close Combat
- Knock Off
- Heavy Slam
- Fake Out

As a reminder, Flame Orb's burn doesn't damage you on the turn it triggers. The status protection it brings is wonderful - the usual annoyances like Yawn, Will-o-Wisp and Flame Body are no longer a concern.

The EV spread is custom-made for Barry & Palmer's team #3, allowing Hariyama to survive two non-critical Wood Hammers from Torterra-5 with one round of burn damage. The reasoning for the spread can be found in the "matchups" section. Since Hariyama's base HP is incredibly high, the remaining EVs go to SpD. While the final Speed stat of 49 is definitely on the fast side by Trick Room standards, BDSP's enemy roster is missing most of the slow-but-strong gang that appeared in later gens (Shiinotic, Reuniclus, Hatterene, etc.). As things stand, Hariyama is rarely in danger of being immediately undersped and revenge killed by such mons.

Fake Out is used in the vast majority of battles, and only ever gets skipped in favour of removing items like Quick Claw in a select few matchups. Between opponents that threaten either Bronzong (strong EQ/EP mons) or Hariyama (mostly Psychic-types), Taunt/Roar users, and freeze/para/sleep mons, there's no shortage of valuable targets. Opposing flinch users are worth mentioning as well - clicking Fake Out on Leafeon-2 feels silly, but stopping that potential flinch from Bite goes a long way. On a related note, resist switches feel much more common in BDSP than in the previous facilities, and Fake Out can occasionally trigger them. For example, Kegan & Noelle (Kegan: Staraptor-2, Raikou-3 & Noelle: Togekiss-2, Mismagius-3) have done a resist switch in three out of the four battles, with Missy coming in to "immune" a Normal-type attack only to get hit by a Gyro Ball.

Heavy Slam's primary purpose is to cover fairies such as Togekiss and Granbull, the latter of which dies through Intimidate. Interestingly, Heavy Slam outdamages Hariyama's other options on various enemies, including Bug- and Poison-types such as Heracross, Muk, Weezing, and the Nido royalty.
*********************
Snorlax @ Wide Lens
Ability: Thick Fat
EVs: 4 HP / 252 Atk / 252 Def
IVs: 0 Spe
Brave Nature
- Double-Edge
- High Horsepower
- Hammer Arm
- Crunch

The lukewarm take here is that Snorlax can afford to drop Belly Drum for extra coverage, a bit like how Sylveon can drop the Specs for an Iron Ball just fine.

Since Return is unavailable, Double-Edge is chosen as the STAB instead. While the recoil may seem worrisome, the coverage brought by the other three moves lets Snorlax avoid stacking up too much detrimental chip damage. The recoil actually has a small upside - you'll know exactly how much damage was dealt, which can sometimes help with judging damage ranges and rolls. DE's 120 base power is enough to keep sets such as DD Gyarados in check, provided that you can switch in after Intimidate is triggered.

Hammer Arm was chosen with Barry's Snorlax-4 in mind, both hitting it super effectively, as well as letting you out-slow the Speed drops from Curse. Some of the other important targets include Lapras and Blissey. Wide Lens is required to bump Hammer Arm's accuracy up to 99%. Looking through my notes, the dreaded 1% miss has occurred twice in the 340+ battles so far, but fortunately not at the worst possible times. A different held item could be used after the HOME update reintroduces Gravity.

Crunch wishes it was Knock Off, but the coverage is more or less mandatory against opposing Drifblim and Mismagius, who would otherwise completely wall the set. Bronzong (enemy's) is another good target, since the AI only ever rocks Levitate. As a minor bonus, having a second attack for Ghost-types like Gengar and Froslass can help with planning around Cursed Body procs, depending on their partners.

With Wide Lens (and later, Gravity) patching up High Horsepower's imperfect accuracy, you're left with what feels like a single-target Earthquake, with very few drawbacks. The initial streak ran Rock Slide instead of Crunch, completing a pseudo- EdgeQuake combo. Rock Slide felt like a good move to click when the other sweeper was going to do ~95% to an opponent, and when Snorlax didn't have a clean KO on either enemy. The other applications included breaking the occasional Sash/Sturdy while fishing for flinches, something that a spread move was helpful for. There was also the prospect of running a non-contact move. After revisiting some of the matches, it turned out that Rock Slide was never strictly mandatory for winning, making the move ultimately impossible to justify using.

Snorlax has a few other options. STAB Self-Destruct is a nuke, but this really isn't the team for it - as a minimum, you'd want to run Dusknoir, and maybe Protect on the other two sweepers. After You could be a good way of supporting Octillery: without it, sets like Steelix-2 (Speed tie) and Rhydon-2 get to chip away at the octopus before it gets to act. Belly Drum seems risky without supporting abilities or moves like Intimidate, Ally Switch, Follow Me, or even a backline Fake Out.

Thick Fat was originally intended to be insurance against Torkoal-2. The capability to switch in on Eruption quickly lost its value when it turned out Torkoal-2 likes mixing in Heat Waves, with the burn chance ruining the plan. Therefore, Snorlax rarely comes in on Fire- and Ice-type attacks not called Overheat, or possibly Magma Storm. Regardless, even with its limited utility, Thick Fat is likely more useful than Immunity, or Gluttony with no held berry.
*********************
Octillery @ Mystic Water
Ability: Sniper
EVs: 252 HP / 252 SpA / 4 SpD
IVs: 0 Spe
Quiet Nature
- Water Spout
- Ice Beam
- Flamethrower
- Energy Ball

Water Spout flat-out rolls some teams. Add in Mystic Water and Rain Dance, and you're looking at a move that outdamages a super effective Energy Ball even if resisted, which is actually a helpful insight for facing last-mon enemy Suicunes. Despite its great damage output, Water Spout is far from an automatic "you win" button. Outside of rain, its damage output is (very roughly) in the same ballpark as a Choice Specs Sylveon's Hyper Voice.
Suicune example (note that the Water Spout calc below requires both 100% HP and a single opponent):

252+ SpA Mystic Water Octillery Water Spout (150 BP) vs. 252 HP / 0 SpD Suicune in Rain: 97-114 (46.8 - 55%)

252+ SpA Octillery Energy Ball vs. 252 HP / 0 SpD Suicune: 88-104 (42.5 - 50.2%)

*********************

Damage comparisons (with split damage penalties):

252+ SpA Mystic Water Octillery Water Spout (150 BP) vs. 0 HP / 0 SpD Regigigas: 100-118 (54 - 63.7%)

252+ SpA Choice Specs Pixilate Sylveon Hyper Voice vs. 0 HP / 0 SpD Regigigas: 93-111 (50.2 - 60%)

252+ Atk Sand Force Mega Steelix Helping Hand Earthquake vs. 0 HP / 0 Def Regigigas in Sand: 123-145 (66.4 - 78.3%)

252+ Atk Thick Club Marowak Earthquake vs. 0 HP / 0 Def Regigigas: 94-112 (50.8 - 60.5%)
The need to stay at high HP created by Octillery's reliance on Water Spout highlights the importance of removing Quick Claws via Knock Off. Barry & Palmer team #3 is a good example of this (see the next section). That being said, Fire/Grass/Ice coverage is often sufficient for the octopus to function even in scenarios where its HP gets chipped down. Dropping Flamethrower for Scald or Hydro Pump could be worth exploring in the future.

Sniper can come in handy against last mon Calm Mind users, such as Cresselia or Suicune. Still, it's nothing to rely on. It's one of those things that you forget about, until you look away for a second and Octillery's killed something it never should have, leaving you confused. "Was it a Zoroark?", you'll wonder, before realising that is your restricted sparring PTSD kicking in.
*********************
Matchups and threats:

Some of the trainers here are listed because of how threatening they are, while others are mentioned to give examples of how the team plays out (in no particular order). Since the streak is still ongoing, it's likely that the list below is far from final. There may be, and likely are, even more dangerous opponents I simply haven't encountered yet. For example, the Donphan-3 lead avoided the squad for the longest time.

Barry & Palmer team #3 (Barry: Torterra-5, Snorlax-4 & Palmer: Milotic-8, Heatran-13)

A common encounter, and one of the matchups that took a while to figure out. It might also serve as a good example of the value brought by Knock Off for anyone considering a Water Spout/Eruption team.

In essence, the gameplan is to prioritise removing the main threats, Torterra-5 and Snorlax-4. Both Hariyama and Snorlax will struggle to efficiently KO the Impish 252HP/252Def Torterra, while Octillery will be treading on thin ice as long as the Quick Claw remains in play. Barry's Snorlax-4 is a Curse set, with Body Slam bringing additional hax to the table. The average battle should loosely follow the script below:

T1: Trick Room, Fake Out on Milotic

Milotic-8 is the preferred Fake Out target because it can freeze Hariyama. It will either Protect or get flinched, while Torterra usually opens with either Wood Hammer on Hariyama, or a Bulldoze. After the first turn, Milotic is best left ignored due to its sporadic targeting, Hydro Pump's imperfect accuracy, and its unpredictable Protect usage. It does not seem to utilise Muddy Water at all, opting to use its stronger Water STAB instead.

T2: Switch Bronzong out, Octillery in. Knock Off on Torterra

Removing Quick Claw is a prerequisite for Octillery to be brought in - otherwise it risks dying to a QC Wood Hammer. Eating a Bulldoze on the switch in is fine, since the speed drop means the octopus gets to move before Snorlax-4 even after it Curses.

This brings us back to Hariyama's EV spread. Surviving long enough to use Knock Off is extremely important, and having to tank two Wood Hammers by the end of the second turn is a common occurrence. 164 EVs in Defense means it will survive just that plus the burn damage, unless Torterra either scores a critical hit or gets the maximum roll on both attacks. It's worth noting that while Milotic can finish off a weakened Hariyama, it can't do so before Knock Off is used.

In other words, for the Knock Off to be denied, Torterra needs to select Wood Hammer twice in a row, either crit once or max roll twice, and get a QC proc on the second turn. To deny Ice Beam, it would then need an extra QC proc on the turn after.

T3: Ice Beam Torterra, and chip away at Milotic

Ice Beam would be a guaranteed kill even without the damage from Knock Off. Hariyama will usually be KO'd by the end of the third or fourth turn, letting Snorlax (player's) join the battle.

T4: Water Spout, and either CC or Hammer Arm Barry's Snorlax-4

ILCA was merciful enough to make Snorlax-4 Adamant instead of Brave, meaning Hariyama gets to move first at 49 Speed vs Snorlax-4's 50. Losing Hariyama before it can use Close Combat here is not a dealbreaker. CC downs Snorlax-4 in one hit, while Hammer Arm will require multiple tries. Absent-mindedly clicking Energy Ball on the Milotic is a bad idea, since it can cause problems if it gets boosted by Competitive.

Once Snorlax-4 goes down, the rest of battle should go smoothly. Heatran will fall to even weakened repeated Water Spouts, and High Horsepower destroys it, if available.

Using Fake Out on Milotic has the added benefit of sometimes prompting a resist switch on the second turn, and with luck, Barry Bulldozing its allied Heatran as it enters the fray. Perhaps the current 1k record holder was onto something while naming the rival character at the start of the game?

A few more words on Torterra-5. Out of the 17 battles I have notes for (across two streaks), it has opened with two Wood Hammers twice, two back-to-back Bulldozes thrice, done Bulldoze into Wood Hammer once, and Wood Hammer into Bulldoze a whopping eleven times. Out of those eleven times, Pokemon Trainer Stupid has inadvertently Bulldozed Palmer's Heatran twice. Thanks for throwing!
Ellis & Irene team #7 (Ellis: Abomasnow-4, Rhyperior-4 & Irene: Bronzong-3, Rotom-Wash-2)
Ellis & Irene team #8 (Ellis: Abomasnow-4, Torkoal-2 & Irene: Bronzong-3, Rotom-Wash-2)


To preface, Irene's Bronzong has a Brave nature with 31 IVs in Speed, meaning its final stat is 47. Not having to gamble with Speed ties is wonderful, thank you based ILCA.

Fishing for a Fake Out on Abomasnow is worth it regardless of its tendency to spam Protect. Potentially breaking its Sash allows for different plays later on, and its partner Bronzong-3 deals very little damage on the first turn.

The worst possible outcome is Trick Room getting reset by Irene's Bronzong, with the enemy backline posing a huge threat outside of TR. Fortunately, there's a way of avoiding this scenario: Fake Out Abomasnow, and... Gyro Ball the opposing Bronzong-3 on the first turn. Thus far, Ellis & Irene are the only opponents where clicking TR on the first turn can be considered a misplay.

Bronzong-3 has 174 HP, which means it takes 10 damage per turn from hail. Gyro Ball does 8, and Knock Off does 152, minimum. This translates to Knock Off having a 14/16 chance of downing Irene's Bronzong-3 after Gyro Ball and one round of hail damage. Since TR is not used on the first turn, Bronzong-3 can't "reset" it even if it survives the Knock Off. In that scenario, the worst it can do is attack before hail finishes it off, while the player's Bronzong is free to use Trick Room at the end of the second turn.

The battle doesn't end there, though. Replacing Bronzong-3 will be Rotom-Wash-2. Modest Hydro Pump does a ton to Hariyama, and Thunderbolt nails Octillery. It can burn Snorlax with Will-o-Wisp, and Discharge's paralysis chance is there, too. It's bulky enough to survive Close Combat 25% of the time, and its Sitrus Berry means it won't subsequently die to hail damage. Regardless, the CC roll is still worth going for.

Once Irene's Bronzong goes down, the flow of the match tends to depend on Abomasnow's actions. It can target either Bronzong or Hariyama with its attacks, and Protect makes it even more unpredictable. Whether its Sash stays intact or not also influences the battle.

EDIT: The up-to-date version of the team handles this battle differently. Targeting Irene's Bronzong with your own is still optimal, but you should use Psychic instead of Gyro Ball. Not only does it deal more damage, but the latter can trigger a resist switch to Rotom-Wash-2, which is not ideal. Also, doubling into Rotom-Wash with both Psychic and Close Combat is much safer than relying on CC's chance to OHKO alone. This way, the battle can be reliably turned into a 2v1.
Lionel & Abbey team #8 (Lionel: Bellossom-2, Lapras-3 & Abbey: Torkoal-2, Cresselia-6)
Lionel & Abbey team #9 (Lionel: Bellossom-2, Rhyperior-4 & Abbey: Torkoal-2, Cresselia-6)


While Fake Out and Rain Dance turn Torkoal-2 into a non-threat, Bellossom-2 can cause havoc if it sends Hariyama to sleep on the first turn. Its Moonblast can 2HKO Hariyama as well. After You seems to have a reasonably high priority for the AI - Torkoal is slower than Hariyama, after all.

Rain Dance gets immense value in this matchup, nerfing the threatening Eruption user before it can move, in addition to halving Cresselia's healing from Moonlight. It also halves Solar Beam's base power, which theoretically lets Octillery take one in an emergency. It's important to remember that Torkoal-2 will occasionally mix in Heat Waves even in situations where Eruption would deal more damage.

One of the backlines features Lapras-3, a Sheer Cold set. Snorlax's Hammer Arm is invaluable against it if Hariyama goes down early, even if it misses the 2HKO thanks to Sitrus.
Jaclyn & Kaila team #11 (Jaclyn: Latias-2, Suicune-3 & Kaila: Houndoom-3, Raikou-4)

Houndoom-3 will very rarely open with a Dark Pulse on Bronzong, which means it's the preferred Fake Out target. Latias' Psychic has a 37,5% chance of one-shotting Hariyama (not accounting for crits), but it can sometimes pick CM on the first turn, too. The worst-case scenario for this battle involves Hariyama going down on the first turn, in addition to the backline Suicune-3 either playing "correctly" and boosting up right away, or immediately burning Snorlax with a Scald.
Aldo & Kailey team #7 (Aldo: Drifblim-3, Miltank-3 & Kailey: Golduck-2, Entei-4)

Hariyama has no way of stopping the potential Hypnosis from the Ghost-types. Of those two, Gengar-3 is the bigger threat. It carries Bright Powder, and unlike Drifblim-3, it is capable of OHKOing Bronzong with a max roll crit Shadow Ball. Snorlax can consistently deal with Gengar-3 thanks to Wide Lens, while the other two sweepers will have to rely on Gravity.

Nadia & Dalvin team #10 (Nadia: Gengar-3, Milotic-3 & Dalvin: Crobat-2, Pinsir-3)

Nadia's Gengar-3 threatens Bronzong with the Shadow Ball, while Hariyama has to either flee, or accept its fate in the face of Dalvin's flinch-immune Brave Bat. The first turn looks bad on paper, but Octillery snacks on three out of the four enemies, and Milotic can be isolated and overwhelmed later.

Johanna & Blair team #5 (Johanna: Mamoswine-2, Tauros-3 & Blair: Gengar-3, Regirock-3)

Fissure Mamoswine requires Fake Out, meaning Gengar gets to do as it pleases on the first turn. Again, Water Spout will wipe out the opposition as long as TR goes up.
Not only does it carry Bright Powder, but its partners can be very unpredictable as well. Hariyama is vulnerable to getting frozen or paralysed on the first turn, which can turn the battle into a nightmare. The cyber duck appears as a lead in the two instances listed below.

Ellis & Barrett team #9 (Ellis: Registeel-4, Gyarados-2 & Barrett: Porygon-Z-2, Suicune-4)

Stopping the Double Team Registeel in its tracks early is wise, and with Fake Out it usually only gets one shot at Quick Claw before the incoming Close Combat deletes it.

Antony & Haylee team #5 (Antony: Porygon-Z-2, Cresselia-3 & Haylee: Dewgong-3, Houndoom-3)

Removing the Sheer Cold/Horn Drill Dewgong is priority number one, leaving the duck unscathed for at least two turns. Burning down Haylee's backline Houndoom turns the match into a 2v1, so realistically Pory-Z gets a third turn of free reign. That being said, three turns isn't as awful as it sounds, since the duck is both Timid and unboosted thanks to Download increasing its Attack.
Notably, some of the Articuno and Walrein sets.

Kennedy & Harvey team #9 (Kennedy: Lucario-3, Infernape-4 & Harvey: Articuno-5, Heatran-6)
Elaine & Kennedy team #9 (Elaine: Lucario-3, Lickilicky-3 & Kennedy: Articuno-5, Nidoqueen-4)


Fake Out into Heavy Slam is a guaranteed KO on Articuno-5. Or it would be, if not for Bright Powder. Fortunately, the other enemies aren't the absolute worst.

Anissa & Kegan team #7 (Anissa: Walrein-2, Kindgra-2 & Kegan: Steelix-2, Ludicolo-2)

The brave Steelix-2 is slower than Hariyama, and it has an awkward speed tie with Octillery. The backline consists of Double Team Ludicolo and a Hurricane Kingdra. Flip enough coins, and you're bound to lose eventually.

Tyrell & Mikel team #9 (Tyrell: Meganium-3, Walrein-2 & Mikel: Weezing-3, Skarmory-2)

While it's not a lead in this battle, Bright Powder Walrein sitting behind dual screens is a scary sight. Knock Off is required to stop Weezing's QC Destiny Bond from taking something down with it, and its Dark Pulse can deny Trick Room if you choose to click Fake Out on Meganium instead. Infuriating matchup.
Aldo & Blair team #6 (Aldo: Ursaring-2, Entei-1 & Blair: Donphan-3, Weezing-3)

This is the only duo rocking Donphan-3 as a lead. Its EQ is strong enough to OHKO Bronzong 50% of the time if it crits, and Bright Powder means Fake Out is not guaranteed to land. EVing Bronzong to survive a crit EQ every time would require a huge investment and ruin some of the other important calcs in the process. I've accepted that it's fine to have such an awful lead matchup for the purposes of a team whose goal was to reach 200 wins. For context, doubles masters features 261 trainer matchups, and Donphan-3 is a lead on only one of them. Even then, EQ has to both crit and get the 50% roll for the worst case scenario to occur.

It's most fortunate that Donphan's partner here is Guts Ursaring and not, say, a Ghost-type.
Kailey & Jaclyn team #7 (Kailey: Zapdos-3, Weezing-2 & Jaclyn: Whiscash-2, Altaria-2)
Chester & Tiffani team #7 (Chester: Rapidash-2, Magnezone-2 & Tiffani: Zapdos-3, Skuntank-2)


This one was unexpected. Zapdos-3 is the physical King's Rock meme set. The main concern isn't crit Drill Peck OHKOing Hariyama, but rather its tendency to open with U-turn onto Bronzong. Zapdos' lead partners in both matchups sport OHKO moves: Fissure for Whiscash-2, and Horn Drill for Rapidash-2. Fake Out is required to stop those two, letting Zapdos fish for a flinch on Bronzong, potentially denying Trick Room.
To reiterate, the list above isn't supposed to be exhaustive or perfect in any way. There are many other dangerous scenarios, be it enemies threatening Hariyama with status on the first turn, or Quick Claw users taking to the field with no Knock Off available, among other things. Rather than try to list everything, I hope that the examples above give a decent idea of what to be wary of.

*********************

That is all for now. I'll update the post once the streak is finished - the next goal is 300, but reaching such a milestone will likely require luck with the enemy matchups. Please feel free to ask questions about anything I may have overlooked, or point out any glaring errors either here or in the Battle Facilities discord.
 
Last edited:
Attn DoubleCheck users: there was a (rather major) bug in search v0.1 which caused the first Pokemon of the left trainer to have an incorrect second move. This has been fixed; you may wish to make a new copy, or you can make the edit yourself by performing the following:
  • Go to cell E19 in "Team Search v0.1"
  • Change both of the "B20"s in the formula to "B19"
  • The formula should now say =IF(B19<>"",VLOOKUP(B19,'Tower Sets'!B:K,4,),"")
I hope this didn't cost any streaks. Thanks to JustinTR for pointing this out, and sorry for any inconvenience caused!
Attn DoubleCheck users: this bug again, but for the first Pokemon of the left trainer having an incorrect second move in the third team of pairs where three teams exist. This has been fixed; you may wish to make a new copy, or you can make the edit yourself by performing the following:
  • Go to cell E30 in "Team Search v0.1"
  • Change both of the "B31"s in the formula to "B30"
  • The formula should now say =IF(B30<>"",VLOOKUP(B30,'Tower Sets'!B:K,4,),"")
Thanks again to JustinTR for pointing this out, and sorry for any inconvenience caused!
 
Lost my doubles streak at 86 to the Steelix-2 + Walrein-2 lead, determined to retry this and make it to 100 for the Trainer Card star.

For those that run the Dusknoir + Aron leads how do you deal with that team?
 
Last edited:
Lost my doubles streak at 86 to the Steelix-2 + Walrein-2 lead, determined to retry this and make it to 100 for the Trainer Card star.

For those that run the Dusknoir + Aron leads how do you deal with that team?
In general when I would come across any team that involved a OHKO user I would use the same first turn strat, as the odds dusknoir is targeted + hit by the ohko move is quite low, but I would always target the OHKO user on the first turn of trick room with my double target attacks. I haven’t thought about it in a while but risking the 10% miss from bright power always seemed like a better idea than dropping a gravity to boost the ohko’s accuracy.. got to 300+ with that team so I was either fairly lucky or it was a consistent strat.
 
In general when I would come across any team that involved a OHKO user I would use the same first turn strat, as the odds dusknoir is targeted + hit by the ohko move is quite low, but I would always target the OHKO user on the first turn of trick room with my double target attacks. I haven’t thought about it in a while but risking the 10% miss from bright power always seemed like a better idea than dropping a gravity to boost the ohko’s accuracy.. got to 300+ with that team so I was either fairly lucky or it was a consistent strat.
Just a minor correction, Gravity does not increase the accuracy of OHKO moves. For that matter, evasion moves do not decrease the accuracy of OHKO moves. Those moves use their own formula to determine a hit or miss, and when both pokemon are the same level it’s about 30%.
 
Just a minor correction, Gravity does not increase the accuracy of OHKO moves. For that matter, evasion moves do not decrease the accuracy of OHKO moves. Those moves use their own formula to determine a hit or miss, and when both pokemon are the same level it’s about 30%.
Lol I played the whole streak as if they did… oh well, thank you!
 
Thread update time! I'm sorry this took so long. In addition to being very busy IRL, several decisions & changes had to be made regarding this thread following discussions from the past month on Discord.

Concerns were raised in regard to the accessibility of cheating in BDSP's current state, as well as issues with particular dubious streaks that had been submitted for the leaderboard. While things got a bit heated at times, it seemed we all agreed that new measures should be taken to address it. I have now updated the rules (and the leaderboard), here's a summary of the changes:

  • The proof required for submitting a streak has been changed to a short video that also shows the System menu (see the OP for details and an example). This doesn't prevent all possible foul play, but it helps ensure the player isn't using modified hardware.
  • A new section below the leaderboard has been added, "Streaks under review". Streaks that have been deemed problematic but for which final decisions haven't been reached will be listed there so they don't have a spot on the main leaderboard until they're given the green light. I posted more details about this addition here. Everyone is invited and encouraged to try out the teams listed in team report and share their thoughts / VODs, community input helps provide the data needed to reach a well-informed conclusion.
  • While it's better to voice concerns in the thread or on Discord, I added the option of reporting a dubious streak directly through a form. When enough valid concerns have been raised and justified, this can lead to a streak being placed under review. Please be mindful, abuse of this form won't be tolerated.

These streaks are approaching the 6-month limit for ongoing streaks without an update.
Past the mentioned date, they will be deemed completed and won't be eligible to be added to.

- Q8altaria : You have until June 7th to update your streak.
- Eisenherz : Oops that's me! I have until June 9th to update my rain streak.
- Willow Mango : You have until June 22nd to update your streak.
- TheReflexWonder : You have until July 8th to update your latest Shuckle streak.
- Tersx : You have until July 11th to update your streak.
Hepburnt : It looks like you were submitting your streak for leaderboard, but unfortunately, it falls under the minimum number for now (please see the rules), sorry!

swagraj : Same as above, for this streak.

ChubbyPuppy : I'm sorry but I had to put your streak under review. Your writeup is heavily lacking considering the length of the streak you're claiming, and saying things like "I found none is impossible to win" with a team that has no answer to hax and evasion/OHKO is honestly quite preposterous. If you'd like to elaborate, maybe you could share the Note Anywhere notes you mentioned, and/or go more in depth about the careful planning you've been doing. A recording of you using this team would also be heavily welcome.
 
Hey Eisenherz, no problem. I'm not claiming that every match up is a sure win. It's rather I believe, with careful planning, you can have >50% win rate on all match-ups. Most of them are at >95% win rate.

As for the lineup, I found that with this version of Battle Tower, if you want to hard counter hax, you will have to sacrifice win rate in other more frequent match ups. That's why I opted for having just enough tool to deal with hax, and have enough fire power for everything else.

I would say 70% of the matches are just Garchomp smashing, then Raikou anb Suicune cleaning up. The hardest opponents are ice users and fast dragons. Some key changes to deal with them:
- Focus sash over Lum for Garchomp, better match up vs other dragons.
- Double Scald to deal with being frozen.
- Protect to stall vs evasion teams.

As for the notes, I want to share all of them, but the way the extension works, the notes are tied to one serebii URL where they are created. I'm not sure how to extract everything. I'll share some of them as screenshots below. If anyone wants to request the note for a specific match-up, feel free to reach out.
Within each note, I start out by writing down some turn order description and giving a rating over 5 on how hard the match up is (1 is easy, 5 is super hard). After each subsequent rematch (especially after losses), more information is added on different scenarios the match can go, which moves the opponent are more likely use, what could possibly go wrong, etc...

I would love to do a recording. However, I don't have a capture card.
 

Attachments

  • s1.png
    s1.png
    649.5 KB · Views: 670
  • s2.png
    s2.png
    466.6 KB · Views: 761
  • s3.png
    s3.png
    475.5 KB · Views: 454
  • s6.png
    s6.png
    464.1 KB · Views: 456
  • s5.png
    s5.png
    370.8 KB · Views: 444
  • s4.png
    s4.png
    512 KB · Views: 498
Today, I'd like to submit an ongoing streak of 504 wins in Master Class Doubles. I wasn't planning on submitting this as I was mainly using this team to grind out some BP for other teams, but after a couple of failed attempts, this latest streak just kept going. The team was created by a Japanese player named Ryo. So let's begin...

latios.gif

Latios @ Focus Sash
Ability: Levitate
Level: 50
EVs: 4 Def / 252 SpA / 252 Spe
IVs: HT/xx/31/31/HT/31
Timid Nature
- Psychic
- Energy Ball
- Ice Beam
- Tailwind

First up, Latios. A really great Tailwind setter! There isn't much that outspeeds Latios in this Tower so it's almost always able to set up Tailwind safely when needed. Gen 8's dynamic speed tiers also makes Tailwind even better than before as it can help Latios' partners outspeed things the same turn its used as opposed to waiting until the next turn. Ryo says Latios' Psychic is useful for dealing with the Fighting-types that Kangaskhan doesn't like. Energy Ball and Ice Beam are also great for dealing with a lot of the stuff that is 4x weak to both attacks. He does also say, however, some of the Water/Grounds in the Tower can be tanky enough to survive an Energy Ball so sometimes doubling up with Kangaskhan can help.

kangaskhan.gif

Kangaskhan @ Life Orb
Ability: Scrappy
Level: 50
EVs: 4 HP / 252 Atk / 252 Spe
IVs: 31/HT/31/xx/31/31
Adamant Nature
- Fake Out
- Double-Edge
- Drain Punch
- Earthquake

First off, I'd like to thank Tersx for donating this Kangaskhan to me. I was really not looking forward to checking the Great Marsh everyday. Anyway, yeah, Kangaskhan. I very seriously doubted Kang working so well but hey, here we are. To be honest, Kang is so much stronger than I expected! Fake Out helps out Latios get off Tailwind if needed and also does some nice chip to a good chunk of the Tower roster. Double-Edge does great damage to stuff that doesn't resist it. Drain Punch for recovery, and Earthquake for good spread damage. Scrappy also allows Kangaskhan to hit Ghosts with the first 3 attacks. Another fun thing about Scrappy that I didn't even realize until I saw it happen is it now blocks Intimidate as well. Which is great for stuff like Arcanine, Gyarados, Granbull, and Salamence. Like I said in Latios' blurb, Kangaskhan is a great help to Latios in both dealing valuable chip damage and enabling Tailwind. There also isn't many Fake Outs that are faster than Kangaskhan either - Weavile, Ambipom, Infernape, and Medicham. Fake Out+Double-Edge is also great for eliminating a lot of stuff.

blaziken.gif

Blaziken @ Wide Lens
Ability: Speed Boost
Level: 50
EVs: 156 HP / 252 Atk / 100 Spe
IVs: 31/31/31/xx/31/31
Hardy Nature (minted to Adamant)
- Flare Blitz
- Low Kick
- Rock Tomb
- Protect

Next up, Blaziken. This guy's great. Blaziken has another form of Speed control on the team with Rock Tomb. I've been rarely clicking it unless used for chip, which I'm sure is the wrong way to use this Blaziken but it's still been working to my advantage. Wide Lens allows Rock Tomb to hit 100 accuracy and also helps when Flare Blitz and Low Kick have their accuracy lowered vs Bright Power/Lax Incense opponents and Double Team spamming opponents. Blaziken has enough Speed EVs to outspeed Barry's Scarf Heracross in Tailwind. Blaziken is extremely powerful and does great damage with just Flare Blitz and Low Kick. Blaziken also happens to be the only member of this team with Protect. Protect can buy you a turn to get a much needed Speed Boost if there is no Tailwind and can also be used with Kangaskhan's Earthquake.

magnezone.gif

Magnezone @ Leftovers
Ability: Sturdy
Level: 50
EVs: 252 SpA / 4 SpD / 252 Spe
IVs: 31/xx/31/31/31/31
Rash Nature (minted to Modest)
- Thunderbolt
- Shock Wave
- Flash Cannon
- Tri Attack

Last, we have Magnezone. With Sturdy, Magnezone ends up being immune to OHKO moves and can also survive an attack if it would OHKO at full HP. Originally, Ryo had Protect over Shock Wave but switched it up after a loss. He says it helps vs opponents that carry Bright Powder, Lax Incense, and Double Team. He also says Tri Attack is used to hit opposing Electric and Water/Ground Types that would otherwise resist Thunderbolt/Shock Wave/ Flash Cannon. I'm not exactly sure why he chose Leftovers as the item but I decided to continue going with it since I couldn't find a better item that fit (did not like the idea of being locked if I went Choice Specs or Scarf).
To be perfectly honest, I haven't been keeping too many notes on threats myself but a lot of the usual stuff can be seen as threats: Bright Powder and Lax Incense stuff, Quick Claw stuff, Double Team spammers, OHKO moves users, etc. Ryo does have some problem match-ups listed on his blog and that includes:
Ellis & Irene: They lead with Bronzong / Abomasnow. The play here is to Fake Out Bronzong and switch Latios out to Blaziken. Abomasnow either uses Protect and Blizzard here most of the time. Blaziken's Flare Blitz takes out Bronzong while Kangaskhan's Drain Punch will deal significant damage to Abomasnow if it doesn't Protect, getting Kang some much needed HP. Behind Bronzong is Rotom-Wash. Weaken it with Kang's Double-Edge while Protecting Blaziken. IfKang dies here, bring Latios back in and finish off Rotom with Energy Ball while taking Abomasnow out with Low Kick or Flare Blitz (unless it's still full in which case, it most likely lives with its Sash. From here you can just win the battle by focusing up the remaining side.

Lionel & Abbey: Another Ace Trainer duo! This one leads with Torkoal / Bellossom. Fake Out Bellossom to break its Sash and set up Tailwind so you can be faster than the Bellossom. Kangaskhan dies here to Torkoal's Eruption while Latios takes around half. Weakening Torkoal next turn with Psychic is the play while KOing Bellossom with Blaziken's Flare Blitz. Double up on whatever's behind the Bellossom after and then you can focus on the Torkoal side after.

Elaine & Coby: Ryo describes this as the "strongest evil pair". Using Fake Out on Zapdos turn 1 prevents the use of Discharge or Double Team on turn 1. Removing Zapdos and then Marowak is the key here. Ludicolo also has Double Team and Substitute so watch out for those as well.

Bryon & Kristi: This pairing can also cause issues. I usually like to Fake Out Starmie and get Tailwind up ASAP. Zapdos doesn't usually Discharge here since Starmie is weak to it but it is still possible, so watch out. Otherwise, it spams Double Team. Ryo recommends removing Zapdos and then Politoed is key here. I usually remove Starmie with an Energy Ball and Double-Edge Zapdos myself. Of course, the Double-Edge can miss thanks to Bright Powder+potential Double Team. Double-Edge to Froslass immediately removes once it comes out after Starmie.
Alright, time for some of my notable battles. I don't have a lot but there is some near losses I suffered both due to misplays or just straight up playing bad. These are sorta rough so I'll be going over the battles turn-by-turn. Sorry for the lack of videos again.

Battle 158 vs Daron / Jaime
Blaziken-3 / Articuno-2 / Hypno-3 / Golduck-3
Turn 1 - Kangaskhan uses Fake Out on Blaziken to make sure it doesn't use Close Combat on it. Latios uses Tailwind, but Articuno freezes Kangaskhan with an Ice Beam. Yikes.
Turn 2 - Kang switches to Blaziken. Enemy Blaziken Protects which causes Latios to whiff Psychic. Articuno then uses Ice Beam again on the Kang slot, this time hitting my Blaziken.
Turn 3 - Latios is able to land Psychic now on enemy Blaziken and KOs it. My own Blaziken then KOs Articuno with Ice Beam.
Turn 4 - Hypno and Golduck come out. Hypno's Quick Claw activates and it KOs Blaziken with Zen Headbutt. Latios uses Ice Beam on Hypno. Golduck then hits Latios with a Waterfall, obviously meant for Blaziken.
Turn 5 - Magnezone sent out. I wasn't paying attention this turn which caused me to miss Tailwind deactivating (I really should have been counting my turns!). Latios lands another Ice Beam on Hypno. Hypno and Golduck then KO Magnezone with Brick Break+Cross Chop. Oops. If I noticed Tailwind went down, I would have used that instead and hit Golduck with a Thunderbolt.
Turn 6 - Knagaskhan back out, still frozen. I try to use Fake out on Hypno but I don't thaw out, ugh. Latios does use Energy Ball on Golduck which does not KO. Golduck KOs Kang with Cross Chop and Hypno goes for Brick Break into Latios.
Turn 7 - Latios is able to KO Golduck with another Energy Ball while Hypno Swaggers Latios.
Turn 8 - Latios does not hit self and hits another Ice Beam, still doesn't KO. Hypno uses Zen Headbutt and misses.
Turn 9 - Hypno gets another Quick Claw proc, lands Zen Headbutt. Latios does not flinch or hit itself and is able to finish the battle with one last Ice Beam.

Battle 185 vs Bryon / Hernan
Froslass-2 / Slowking-3 / Blastoise-3 / Moltres-2
Turn 1 - Kangaskhan use Fake Out on Froslass, which Cursed Body disables. Latios sets Tailwind and Slowking uses Swagger on Latios.
Turn 2 - Switch Latios out to Magnezone, while Kang's Drain Punch KOs Froslass. Slowking then uses Psychic on the Latios slot, which is now occupied by Magnezone.
Turn 3 - Blastoise comes out. Its Quick Claw activates but it misses Focus Blast on Magnezone. Blastoise then goes down to Double-Edge+Thunderbolt. Slowking uses Surf.
Turn 4 - Kang misses Double-Edge on Slowking thanks to Bright Powder. Magnezone uses Shock Wave on Slowking which does just over 50%. Slowking then KOs both Kang and Magnezone with another Surf.
Turn 5 - Latios and Blaziken come out. Blaziken uses Protect while Latios finishes off Slowking with an Energy Ball.
Turn 6 - Moltres comes out last, and is KO'd by Psychic+Rock Tomb.

Battle 260 vs Cain / Hans
Electrode-3 / Golem-3 / Hariyama-2 / Cresselia-2
Turn 1 - Kang Fakes Out Golem and Electrode hits Kang with Thunderbolt. It paralyzes. Latios then sets Tailwind.
Turn 2 - Because of the paralysis, I'm unable to KO Electrode now with Psychic+Double-Edge so I switch out Latios to Magnezone expecting a Thunder Wave. Golem charges up a Focus Punch, and Electrode whiffs the Thunder Wave on Magnezone as expected. Kangaskhan does not get full-para'd and is able to Drain Punch Golem for some damage, which breaks Golem's focus.
Turn 3 - Switch Magnezone back to Latios. Golem charges another Focus Punch, while Electrode hits Latios with Thunderbolt. Kangaskhan then KOs both with Earthquake.
Turn 4 - Hariyama and Cresselia come out. Latios KOs Hariyama with Psychic which was a very lucky roll (252 SpA Latios Psychic vs. 252 HP / 4 SpD Hariyama: 228-270 (90.8 - 107.5%) -- 43.8% chance to OHKO). Kang hits Cress with Double-Edge, while Cress uses Future Sight (because BDSP doesn't have the in-battle status screen, I'm unable to determine who it used Future Sight on but it was most likely Kangaskhan).
Turn 5 - Tailwind expires. Latios uses Ice Beam on Cress. Cress uses Safeguard, and Kang hits it with another Double-Edge.
Turn 6 - Latios KOs Cress with another Ice Beam.

Battle 474 vs Kevon / Hernan
Tyranitar-2 / Manectric-2 / Forretress-3 / Latias-3
Turn 1 - Kangaskhan uses Fake Out on Manectric, Latios sets Tailwind. Tyranitar hits Latios with a Dragon Claw.
Turn 2 - Tyranitar's Quick Claw activates! It KOs Latios with another Dragon Claw. Kang KOs Tyranitar with Drain Punch and Manectric paralyzes Kangaskhan with Thunder Wave. Ugh. Had QC not activated, Latios would KO Manectric here with Psychic.
Turn 3 - Blaziken comes out, while Kevon sends out Forretress. Blaziken KOs Manectric with a Low Kick. Kang gets fully paralyzed, and Forretress hits Kang with a Rock Tomb.
Turn 4 - Hernan sends out Latias. Blaziken brings Forretress down to its Sturdy with a Flare Blitz and burns it! However, Latias KOs Blaziken with a Psychic. Kangaskhan is fully paralyzed again and Forretress uses Earthquake, which does pitiful damage to Kang. It then faints to its burn.
Turn 5 - Magnezone comes out. Tailwind also expired here. Latias hits both with a Surf, while Magnezone lands a Flash Cannon on the Latias (worried because Bright Powder...). Kang is once again fully paralyzed. 3 turns in a row.
Turn 6 - Latias KOs Kang with a Psychic while Magnezone lands another Flash Cannon.
Turn 7 - Latias fails to KO Magnezone with Surf and Mag is able to finish the battle with another Flash Cannon.

Battle 490 vs Barry / Palmer
Dragonite-11 / Heracross-5 / Cresselia-11 / Infernape-7
Turn 1 - So usually when facing this team, the play is to Fake Out Dragonite to break its Multiscale and have Latios set Tailwind. Heracross then KOs Kang with Close Combat and gets a Moxie boost. This time, however, Heracross spares Kangaskhan and Close Combats Latios for some reason. Dunno why, but we take those. Latios is then able to get its Tailwind off.
Turn 2 - Latios' Ice Beam KOs Dragonite and Kang is able to KO Heracross with Double-Edge and the Defense drop from the earlier Close Combat.
Turn 3 - Cresselia and Infernape come out. Infernape uses Fake Out on Kangaskhan, while Latios brings it down to its Sash with Psychic. Kang flinches and Cresselia finishes off Latios with a Moonblast.
Turn 4 - Magnezone comes out. Kang KOs Infernape with a Double-Edge while Magnezone lands a Thunderbolt on Cress.
Turn 5 - Tailwind expires. Magnezone hits Cress with another Thunderbolt, which heals back some HP with its Sitrus Berry but it also gets paralyzed. Kang then uses Double-Edge on Cress, does some decent damage. Cress is fully paralyzed.
Turn 6 - Magnezone is then able to finish off Cress with another Thunderbolt.
That's all for now. I definitely think this team has the potential to hit 1000 so that's my next goal.
 
Last edited:
JustinTR Nice team! Do you (or anyone else reading this) know of any blog/page that shows japanese tower teams?

Two cool reasons for using Leftovers could be that it 1) keeps sturdy intact by healing hail damage, as hail damage applies first, and 2) allows Magnezone to survive a fire move that brings it down to sturdy and burns, as leftovers applies before burn damage. A part of me still thinks wise glasses or magnet would be more useful overall, but I'd need to study match ups in depth to know..
 
Last edited:
Entitlement frowned and lowered her iPhone ever so slightly.

:clefable: i mean
:clefable: i didnt come in last time fsr but i guess u didnt really need BDE last time we faced this guy
:clefable: like i wasnt really paying attention but like wasnt that alligator thing not fp the 2nd turn or w/e? idk i kind of zone out after he uses power split lol

She had a point. A few battles back, we’d faced off against Hiker Aldo, who had led with this very same Feraligatr:


Hiker Aldo
Ability:
Sheer Force
Attacks:
Waterfall
Ice Punch
Crunch
Dragon Dance
Hold Item:

Life Orb
Nature:
Jolly
Effort Values:
HP: 20
Atk: 252
Spd: 236
Ability:
Storm Drain
Attacks:
Scald
Earth Power
Recover
Mirror Coat
Hold Item:

Wiki Berry
Nature:
Bold
Effort Values:
HP: 252
Def: 252
S.Atk: 4
Ability:
Chlorophyll
Attacks:
Leaf Blade
Leech Seed
Synthesis
Protect
Hold Item:

Leftovers
Nature:
Careful
Effort Values:
HP: 252
Atk: 4
S.Def: 252

Ability:
Sheer Force
Attacks:
Waterfall
Ice Punch
Crunch
Dragon Dance
Hold Item:

Life Orb
Nature:
Jolly
Effort Values:
HP: 20
Atk: 252
Spd: 236
Ability:
Poison Heal
Attacks:
Earthquake
Guillotine
Substitute
Protect
Hold Item:

Toxic Orb
Nature:
Jolly
Effort Values:
HP: 252
Def: 100
Spd: 156
Ability:
Sand Stream
Attacks:
Earthquake
Dragon Claw
Shadow Claw
Iron Head
Hold Item:

Quick Claw
Nature:
Adamant
Effort Values:
HP: 4
Atk: 252
Spd: 252


As you can see, this Aldo tandem is a bit threatening, especially since Gatr happens to outspeed my lead by one point.

:smeargle: Verily, whatever it is you require from me, good sir, I am at your beck, and your call.

:clefable: loool boo, tomato tomato tomato u r such, SUCH a dork but i love it so much

Smocktail looked over his shoulder, tipped his beret in Entitlement's direction, and winked. It was not unlike the Baby-Doll Eyes move I'd finally decided on for its last move, though ironically this wink seemed to have a marked effect on my Unaware Clefable, who blushed before burying herself back into her smartphone.

Last time, as she pointed out, we were NOT graced with an FP that made our job a bit easier. Prior battles against this Aldo tandem proved to be too challenging to consider anything else, like saving Smeargle to cripple the potential QC Tyra or Guillotine Gliscor that were tough for Clef to beat even fully set-up.

It was also challenging, however, to get Drapion set up against Gatr due to DD and the annoying “afterfact” that Knock Off, if used on Gatr to reduce Life Orb damage, could trigger a “resist switch” to a hard-to-win EQ Tyra vs. Drap matchup. Clef’s Sub always breaks to LO Waterfall despite Unaware, and using Knock to rid Gatr of its LO isn’t a resist-switch risk I’m willing to take. And Tyra has Iron Head that easily 2HKOs Clefable and QC to render everything but BDE useless from 1HP Smeargle.

And this isn’t even the most threatening pokemon on Aldo’s team—nobody likes the prospect of a pokemon that can outspeed and OHKO your entire team. Gliscor also easily 2HKOs Drapion and always breaks my megabold Clef’s Sub, so…positioning myself to win this battle took a lot of thought beforehand.

This time around, I was graced with a fortunate FP on Turn 2, after Glare into Power Split, that let me decide which of my Smeargle’s final two moves, Torment and Baby-Doll Eyes, was best to enhance my chances of winning this tough matchup again.

I commanded my Smeargle to use BDE, Gatr took it out, and I brought out my trusty Drapion.

:drapion: Dude I can beat this myself, I know it. Got lame boosts last time and still beat it. I know I got this.

DRAP RETURNS wagged its lethal tail with steady, confident swishes, a purple metronome of confidence just waiting to get things turned up to 11.

There’s nothing my Drapion doesn’t think it can do. Especially with Knock Off, which is the only real change from my Drapion 13 years ago. I like that about it, and it has proven itself time and time again now with the ability to use Acupressure behind a Substitute unlike in original DPPT. So prioritizing being behind a Sub, I used Acupressure. This calc was comforting:

-1 252 Atk Life Orb Sheer Force Feraligatr Waterfall vs. 252 HP / 60 Def Drapion: 32-40 (18 - 22.5%)

This one, however, not so much:

+1 252 Atk Life Orb Sheer Force Feraligatr Waterfall vs. 252 HP / 60 Def Drapion: 75-90 (42.3 - 50.8%)

Just two DDs would put Gatr at +1 Atk (BDE) and it would again be faster than +0 Spe Drapion, so you can see how important it is to maintain a Sub. And how dicey this battle is given what I mentioned about going to Clefable on Turn 3 instead of Drap. I got a Defense boost on the ninth try, amidst an Evasion boost and a Speed boost that had Aldo prioritizing getting Gatr to +6 speed, which allowed me to get the +2 Def I needed to breathe easier (along with FPs).

After I calculated how much +4 Atk Gatr could do to me at +2 Def and knowing I could Sub to “fish” for more misses and FPs to get to that +4 Def I needed to all but ensure victory, the rest of this battle was somewhat of a formality. Entitlement sure seemed to think so.

:clefable: y do u even care lol

She rolled her eyes as ET and I sweated every single boost, boosts she would be unaware of, and took note of every single move Gatr made. The prior battle had a somewhat disappointing Leafeon and Gastrodon to round it out after Drapion somehow got to +4 Atk, Def, Spe and +6 Evasion that guaranteed victory over those potential Tyra/Gliscor threats.

See, the REAL, unintuitive “fallback” plan of using Glare into PS then going Drapion to Sub and get good Acupressure boosts is one that would allow Clef, after Drap died, to better stall out the WFs that break her Sub, thereby allowing her to have one up when it finally killed Gatr. This would allow Clef to OHKO Tyra without risking death by CH or Flinch, then taking our chances against a Gliscor that had used EQ, Sub and Protect against Clef in a prior battle before attempting Guillotine.

The aforementioned battle saw Glare -> PS as Smocktail gracefully (pretentiously) bowed out, then Drapion Acupressuring behind a Sub hoping for a Defense, Evasion or Speed boost (in that preference), which won me the battle. That’s just one sentence there…and in practice it took almost four hours to affect from start to finish, with the above “fallback” plan being much of the painstaking theorymon ET and I went through for that one single battle, despite having spent a fair deal of time months ago on the best course of action against this particularly bad Aldo threat.

This was coincidentally battle 300, a number I didn’t and don’t particularly care about. Truth be told, I hardly care about this one either:

2022-05-06.jpeg

proof vid

Not because I lost, no. The loss was fair (Brant’s Raikou/Snorlax/Entei) and I’ve already devised a new strategy that puts me in a better position to win despite the inherent and unavoidable uncertainty Specs Raikou poses for this team.

For me, it is simply about the artistry of the team, and how well I can create on the canvas that is the BDSP Battle Tower.

--

smeargle-4.png


This is Smocktail. Smocktail can do anything, and he knows it.


smeargle-6.png
@
Dream_Focus_Sash_Sprite.png


Smocktail (Smeargle) (M) @ Focus Sash
Ability: Own Tempo
Level: 50
EVs: 184 HP / 72 Def / 252 Spe
Stats: 155/22/64/25/65/139
Timid Nature
IVs: 0 Atk / 0 SpA
- Glare
- Power Split
- Torment
- Baby-Doll Eyes

GlenSplitting is even better than Glen Scarfing. Why?


252 Atk Power Split Metagross Meteor Mash vs. 244 HP / 252+ Def Clefable: 80-96 (39.8 - 47.7%) -- guaranteed 3HKO after Leftovers recovery

252+ Atk Power Split Technician Scizor Bullet Punch vs. 244 HP / 252+ Def Clefable: 56-68 (27.8 - 33.8%) -- 94.8% chance to 4HKO after Leftovers recovery


The very first note I made to myself in November about BDSP BT:

so since they decided to give latios broken gen V moves like simple beam, stored power and power split (which cant miss) plus have it retain memento how on earth does it not destroy everything

You can't crit through Power Split, and it can't miss. With Smeargle's base 20 Atk/SpA, it's serendipitiously the best user of this move given its decent speed and...passable movepool.

Smeargle turns Clefable into a Metagross and Scizor counter, every time, unironically, something EeveeTrainer helped me realize live. For pokemon that can easily boost their attack and would normally destroy a slower Fairy that's not particularly bulky, this is a hilarious reality. The combination of Unaware, Power Split and Paralysis make Clefable the strategic play against pokemon it's supposed to have no business dealing with.

I'd paste some Drapion calcs here but Power Split isn't as helpful for it as Memento would be given Battle Armor. Speaking of Memento, I had it over Baby-Doll Eyes for quite some time...then I got 3-0ed by this lead:


Idol Tasha
Ability:
Pressure
Attacks:
Rock Slide
Earthquake
Ice Fang
Iron Head
Hold Item:

Muscle Band
Nature:
Jolly
Effort Values:
HP: 4
Atk: 252
Spd: 252
Ability:
Clear Body
Attacks:
Thunder
Blizzard
Focus Blast
Flash Cannon
Hold Item:

Zoom Lens
Nature:
Quiet
Effort Values:
HP: 252
Def: 4
S.Atk: 252
Ability:
Multiscale
Attacks:
Outrage
Earthquake
Fire Punch
Dragon Dance
Hold Item:

Lum Berry
Nature:
Adamant
Effort Values:
HP: 4
Atk: 252
Spd: 252


I hated it before it made a single move, and after it flinched Smeargle with Rock Slide, the rest of my team couldn't do anything about its super effective coverage. I really didn't want to drop Memento, which completely neuters threats like Heatran for Drapion in tandem with Power Split, but BDE proved to be very valuable in the case of pokemon like:


Ability:
Sand Stream
Attacks:
Earthquake
Dragon Claw
Shadow Claw
Iron Head
Hold Item:

Quick Claw
Nature:
Adamant
Effort Values:
HP: 4
Atk: 252
Spd: 252


Ability:
Swift Swim
Attacks:
Crunch
Waterfall
Ice Beam
Aqua Jet
Hold Item:

Sitrus Berry
Nature:
Naughty
Effort Values:
Atk: 252
S.Atk: 4
Spd: 252


Ability:
Technician
Attacks:
Double Hit
Thief
Dual Chop
Fake Out
Hold Item:

Muscle Band
Nature:
Jolly
Effort Values:
HP: 20
Atk: 244
Def: 84
S.Def: 4
Spd: 156


These leads pose a similar flinch and/or CH + Focus Sash invalidation threat that the priority of BDE completely mitigates. BDE is also excellent in a pinch where I have to sac Clefable to some faster pokes that Memento wouldn't work against:


Ability:
Inner Focus
Attacks:
Sacred Fire
Extreme Speed
Crunch
Stone Edge
Hold Item:

Choice Band
Nature:
Adamant
Effort Values:
HP: 4
Atk: 252
Spd: 252


Ability:
Speed Boost
Attacks:
Overheat
Flare Blitz
Protect
Close Combat
Hold Item:

Passho Berry
Nature:
Naughty
Effort Values:
Atk: 252
S.Atk: 4
Spd: 252

BDE also gives Clef an extra turn of setup sometimes when the AI decides to SD or DD an extra turn simply because it's at -1 Atk, as I mentioned in that Aldo Gatr battle.

Torment is easily the most ingenius move on this team. Unlike PS, it can miss, but it allows me to affect crucial switches and effectively "predict" when a threat will use a move I'm worried about and get behind a sub. Speaking of Sub, Torment goes through it, which is a godsend:


Cyclist Kristi
Ability:
Pressure
Attacks:
Sheer Cold
Mind Reader
Substitute
Roost
Hold Item:

Bright Powder
Nature:
Timid
Effort Values:
HP: 252
Def: 4
Spd: 252
Ability:
Clear Body
Attacks:
Ice Punch
Bullet Punch
Zen Headbutt
Meteor Mash
Hold Item:

Figy Berry
Nature:
Jolly
Effort Values:
HP: 4
Atk: 252
Def: 68
S.Def: 4
Spd: 180
Ability:
Intimidate
Attacks:
Waterfall
Earthquake
Ice Fang
Dragon Dance
Hold Item:

Sitrus Berry
Nature:
Adamant
Effort Values:
HP: 84
Atk: 252
Spd: 172

Ability:
Pressure
Attacks:
Sheer Cold
Mind Reader
Substitute
Roost
Hold Item:

Bright Powder
Nature:
Timid
Effort Values:
HP: 252
Def: 4
Spd: 252
Ability:
Clear Body
Attacks:
Ice Punch
Bullet Punch
Zen Headbutt
Meteor Mash
Hold Item:

Figy Berry
Nature:
Jolly
Effort Values:
HP: 4
Atk: 252
Def: 68
S.Def: 4
Spd: 180
Ability:
Intimidate
Attacks:
Rest
Earthquake
Dragon Dance
Waterfall
Hold Item:

Leftovers
Nature:
Careful
Effort Values:
HP: 252
Atk: 4
S.Def: 252

This is Cyclist Kristi, who leads with a 150-speed Sheer Cold Brightpowder Articuno that outspeeds my entire team. Used to be a big threat, but now I use Glare first turn and Torment the rare times it uses Sub to block that Glare. Thoughtful switching to get the right poke in to set up makes this way easier, and is only possible because I take Sheer Cold off the table half the time.


600px-452Drapion.png
@
Dream_Black_Sludge_Sprite.png


DRAP RETURNS (Drapion) (M) @ Black Sludge
Ability: Battle Armor
Level: 50
EVs: 252 HP / 60 Def / 196 SpD
Stats: 177/110/138/72/132/115
Careful Nature
- Knock Off
- Acupressure
- Substitute
- Rest

Never change, Drapion. I’ve mentioned Knock Off in passing, and while its utility may seem obvious to the newer generation of players who haven’t experienced much else but this OP move (in Gen 8 OU as of April 2022, Knock Off is on more Toxapex sets than Scald), it wasn’t a slam dunk over Crunch or Night Slash until it proved itself in practice.

Knocking off LO from Palmer’s Regigigas is easily the most useful application of Knock, as it removes the “timer” from Regigigas and allows Drap’s Sub to never break after -2 Atk (BDE) and a PS. When I don't fear triggering a resist-switch, Drap also Knocks off things like Life Orb from Sheer Force Nidoqueen and Competitive Milotic, Focus Band from (Horn Drill) Rapidash (this can in theory beat any team that doesn't have a ghost, or Sturdy, etc.), and Choice items whenever I feel like it. Knock Off is probably the MVP against Natalia when she brings Kingdra because I Knock Off both Choice Scarf and Life Orb strategically to win.

Being able to Acupressure behind a Sub is something I take for granted somehow, even though my DP record was set without this ability. This is perhaps the single most important thing to go in "our" favor when considering how hard the developers think they've made BT compared to Gen 4 (AI switching out when locked in to status or immune moves, enemy PP ups, competitive EV spreads and natures, actual AI team synergy, etc.).

It can't be overstated how important it is that Drapion can use Black Sludge by coincidence of its Poison typing to free up Leftovers for Clefable. Speaking of the spoiled diva:


036Clefable.png
@
Dream_Leftovers_Sprite.png


Entitlement (Clefable) (F) @ Leftovers
Ability: Unaware
Level: 50
EVs: 244 HP / 252 Def / 4 SpD / 4 SpA / 4 Spe
Stats: 201/67/137/116/111/81
Bold Nature
IVs: 0 Atk
- Moonblast
- Calm Mind
- Substitute
- Moonlight

Entitlement had an unmistakable crush on Smocktail, due entirely in part to how exceptionally well Power Split works in tandem with her Unaware. As mentioned, thanks to Power Split, Clefable unironically sets up on steels like Meta and Scizor since she ignores any stat boosts. She's also somehow better against Heatran than Drapion is, something I learned in practice. Its ability to "entitle" foes by dropping their SpA 30% of the time helps Drapion out in a pinch even if Clef herself is Unaware of those MB drops. Moonblast plus Smocktail's BDE is a cute little SpA/Atk nerfing package that Drapion very much appreciates situationally.

Clefable, on her own, renders so many set-up pokes useless due to Unaware and the fact that the AI prioritizes using these moves even when it should be clear that they’re “useless.” The main thing she has to concern herself with, like with other slowish setup sweepers, is retaining a Sub no matter what when the lead foe goes down.

Megabold is required to take as little damage from extremely common Mamo and Garchomp EQ as possible:


252 Atk Power Split Garchomp Earthquake vs. 244 HP / 252+ Def Clefable: 42-51 (20.8 - 25.3%) -- possible 5HKO after Leftovers recovery
(42, 43, 43, 43, 45, 45, 45, 46, 46, 46, 48, 48, 48, 49, 49, 51)

252 Atk Power Split Mamoswine Earthquake vs. 244 HP / 252+ Def Clefable: 42-51 (20.8 - 25.3%) -- possible 5HKO after Leftovers recovery
(42, 43, 43, 43, 45, 45, 45, 46, 46, 46, 48, 48, 48, 49, 49, 51)


The 1/16 rolls on these allow Clef to be able to retain its sub ~95% of the time against these common leads and kill the remaining pokes.

4 SpD EVs goes a long way:


252+ SpA Heatran Flash Cannon vs. +6 248 HP / 0 SpD Clefable: 44-54 (21.8 - 26.8%) -- possible 5HKO after Leftovers recovery
(44, 44, 44, 44, 48, 48, 48, 48, 48, 48, 50, 50, 50, 50, 50, 54)

252+ SpA Heatran Flash Cannon vs. +6 244 HP / 4 SpD Clefable: 42-50 (20.8 - 24.8%) -- possible 5HKO after Leftovers recovery
(42, 42, 42, 42, 44, 44, 44, 44, 44, 44, 48, 48, 48, 48, 48, 50)


This is Palmer’s Heatran. I have to face it. A lot. Taking the number of FCs that break Clef’s 50HP sub down from six to one just by shifting 4 EVs from HP to SpD is excellent.

The Entitlement nickname is intuitive: Clefable is somehow just as broken in BDSP BT with her ever-increasing embarrassment of riches as she is in OU. Both abilities are beyond great, it's pretty funny how Magic Guard is somehow unused, and that Unaware plays right into the aura of a blithe millennial girl who literally just can't.

--

For what it's worth, only about 30% of the battles I've even played have been with this team. For various reasons there are still things I'm learning about how to play optimally with this team, which is good and bad. I'm confident that there are fewer than five trainers I can't reliably beat 95+% of the time.

I earnestly encourage you to ask me how I deal with other teams and tandems you may find threatening to this team. I can monologue all day about BT but I don’t think that’s what the community needs right now.
 
Last edited:
That's all for now. I definitely think this team has the potential to hit 1000 so that's my next goal.
That didn't age well. I ended up losing on battle 810 vs Jayden and Josie, thus making my final streak with Ryo's Team 809 wins in a row. I still do think this team has the potential to hit 1000 but I don't think I'll be playing it again. It's a very fun team though and I highly recommend it if you need something grind some BP out. Also, I ended up recording some of the final rounds so you can all enjoy my eventual demise. Here's a recap of the team:
latios.gif

Latios @ Focus Sash
Ability: Levitate
Level: 50
EVs: 4 Def / 252 SpA / 252 Spe
IVs: HT/xx/31/31/HT/31
Timid Nature
- Psychic
- Energy Ball
- Ice Beam
- Tailwind

First up, Latios. A really great Tailwind setter! There isn't much that outspeeds Latios in this Tower so it's almost always able to set up Tailwind safely when needed. Gen 8's dynamic speed tiers also makes Tailwind even better than before as it can help Latios' partners outspeed things the same turn its used as opposed to waiting until the next turn. Ryo says Latios' Psychic is useful for dealing with the Fighting-types that Kangaskhan doesn't like. Energy Ball and Ice Beam are also great for dealing with a lot of the stuff that is 4x weak to both attacks. He does also say, however, some of the Water/Grounds in the Tower can be tanky enough to survive an Energy Ball so sometimes doubling up with Kangaskhan can help.

kangaskhan.gif

Kangaskhan @ Life Orb
Ability: Scrappy
Level: 50
EVs: 4 HP / 252 Atk / 252 Spe
IVs: 31/HT/31/xx/31/31
Adamant Nature
- Fake Out
- Double-Edge
- Drain Punch
- Earthquake

First off, I'd like to thank Tersx for donating this Kangaskhan to me. I was really not looking forward to checking the Great Marsh everyday. Anyway, yeah, Kangaskhan. I very seriously doubted Kang working so well but hey, here we are. To be honest, Kang is so much stronger than I expected! Fake Out helps out Latios get off Tailwind if needed and also does some nice chip to a good chunk of the Tower roster. Double-Edge does great damage to stuff that doesn't resist it. Drain Punch for recovery, and Earthquake for good spread damage. Scrappy also allows Kangaskhan to hit Ghosts with the first 3 attacks. Another fun thing about Scrappy that I didn't even realize until I saw it happen is it now blocks Intimidate as well. Which is great for stuff like Arcanine, Gyarados, Granbull, and Salamence. Like I said in Latios' blurb, Kangaskhan is a great help to Latios in both dealing valuable chip damage and enabling Tailwind. There also isn't many Fake Outs that are faster than Kangaskhan either - Weavile, Ambipom, Infernape, and Medicham. Fake Out+Double-Edge is also great for eliminating a lot of stuff.

blaziken.gif

Blaziken @ Wide Lens
Ability: Speed Boost
Level: 50
EVs: 156 HP / 252 Atk / 100 Spe
IVs: 31/31/31/xx/31/31
Hardy Nature (minted to Adamant)
- Flare Blitz
- Low Kick
- Rock Tomb
- Protect

Next up, Blaziken. This guy's great. Blaziken has another form of Speed control on the team with Rock Tomb. I've been rarely clicking it unless used for chip, which I'm sure is the wrong way to use this Blaziken but it's still been working to my advantage. Wide Lens allows Rock Tomb to hit 100 accuracy and also helps when Flare Blitz and Low Kick have their accuracy lowered vs Bright Power/Lax Incense opponents and Double Team spamming opponents. Blaziken has enough Speed EVs to outspeed Barry's Scarf Heracross in Tailwind. Blaziken is extremely powerful and does great damage with just Flare Blitz and Low Kick. Blaziken also happens to be the only member of this team with Protect. Protect can buy you a turn to get a much needed Speed Boost if there is no Tailwind and can also be used with Kangaskhan's Earthquake.

magnezone.gif

Magnezone @ Leftovers
Ability: Sturdy
Level: 50
EVs: 252 SpA / 4 SpD / 252 Spe
IVs: 31/xx/31/31/31/31
Rash Nature (minted to Modest)
- Thunderbolt
- Shock Wave
- Flash Cannon
- Tri Attack

Last, we have Magnezone. With Sturdy, Magnezone ends up being immune to OHKO moves and can also survive an attack if it would OHKO at full HP. Originally, Ryo had Protect over Shock Wave but switched it up after a loss. He says it helps vs opponents that carry Bright Powder, Lax Incense, and Double Team. He also says Tri Attack is used to hit opposing Electric and Water/Ground Types that would otherwise resist Thunderbolt/Shock Wave/ Flash Cannon. I'm not exactly sure why he chose Leftovers as the item but I decided to continue going with it since I couldn't find a better item that fit (did not like the idea of being locked if I went Choice Specs or Scarf).
Here's a little blurb about the final loss...
Battle 810 vs Jayden / Josie
Dewgong3 / Entei1 / Umbreon2 / Raikou2

Turn 1 - Kang can't Fake Out Entei here since this one has Inner Focus but the Dewgong is also one of those OHKO hax sets so Kang uses Fake Out on that. Latios uses Psychic on Entei. Entei then uses Snarl, while Dewgong flinches.
Turn 2 - Latios uses another Psychic on Entei, and Kang finishes it off with Earthquake while chipping Dewgong a little more. Dewgong then misses Horn Drill on Kangaskhan.
Turn 3 - Jayden sends in Raikou. Raikou then uses Double Team as Latios sets Tailwind. Kangaskhan proceeds to miss Double-Edge thanks to the Lax Incense+Double Team combo. Dewgong also misses another Horn Drill on Kangaskhan.
Turn 4 - Both Latios and Kangaskhan proceed to miss Psychic and Double-Edge on Raikou. Raikou then hits Kang with a Scald which also burns. Just my luck. Dewgong, thankfully, misses another OHKO move; this time, Sheer Cold on Latios.
Turn 5 - I figured at this point it was probably best to at least remove Dewgong so it doesn't have another chance to use an OHKO move. Latios goes for Energy Ball on Dewgong, does very little damage but gets a Special Defense drop. Kangaskhan misses another Double-Edge on Raikou. Raikou then uses another Double Team, and Dewgong misses another Sheer Cold.
Turn 6 - Latios and Kang double up on Dewgong and finally take it out. Raikou KOs Kang with Scald.
Turn 7 - Umbreon comes in, while I send out Blaziken. Tailwind also expires. Blaziken and Umbreon both use Protect, Raikou whiffs a Scald into Blaziken's Protect. Latios gets another Tailwind off.
Turn 8 - Latios misses an Ice Beam on Umbreon, thanks Bright Powder. Blaziken does land a Low Kick on Umbreon. Raikou hits Blaziken with a Scald. Umbreon also hits Latios with a Foul Play.
Turn 9 - Blaziken finishes off Umbreon with a Low Kick. Latios is still unable to land an attack on Raikou as it dodges another Psychic. Raikou then KOs Blaziken with another Scald.

After this, you can pretty much guess I lost a couple of turns after this. I believe I landed a Psychic and a Tri Attack at some point which obviously didn't mean much. Latios eventually went down to a Scald from Raikou. Raikou also used Calm Mind in front of both Latios and Magnezone as if it wanted to mock me. After a couple of Scalds, Magnezone slowly goes down and that... was the end. Oh well.
I didn't end up getting any other interesting battles before this so I don't have any other blurbs to write. Sorry! Overall, it was a very good run and I'm very surprised at how good this team felt to play. I do wish BDSP Master Class Doubles was just 1v1 and not 1v2 though. Multi Battle mechanics made some battles incredibly easy and it felt like the team was on auto-pilot a lot.

Also...
JustinTR Nice team! Do you (or anyone else reading this) know of any blog/page that shows japanese tower teams?

Two cool reasons for using Leftovers could be that it 1) keeps sturdy intact by healing hail damage, as hail damage applies first, and 2) allows Magnezone to survive a fire move that brings it down to sturdy and burns, as leftovers applies before burn damage. A part of me still thinks wise glasses or magnet would be more useful overall, but I'd need to study match ups in depth to know..
Sorry for the late reply. I don't know of any other Japanese facility players myself but I do know Ryo has followed the facility leaderboards here on Smogon for quite some time. He also suggested on his blog that Choice Specs or Metronome would probably be better items for Magnezone but Leftovers worked out just fine here. You're absolutely right about Hail and burns though. It does help keep Magnezone healthy and can also keep Sturdy up sometimes.
 
Last edited:
Hey guys,
I’m new here, so apologies if my questions sounds very basic. I used to tackle the Battle Tower (Single) with a pretty casual team: Milotic, Crobat and Torterra. No strategy, no care whatsoever to IVs and EVs. Needless to say, I couldn’t get pass Palmer.
So now I’ve breed the perfect hyper offensive Porygon Z, but I’m not sure which other Pokemon I should add to my team. Theoretically, I could breed a Cloyster/Milotic with perfect IVs, but I’m not sure they would be a good feat.
Any suggestions to build a good team around a Porygon Z?
 
To quote from another BT thread...
▹ If you think the AI is cheating, whether in improbable luck, illegal abilities or illegal movesets, please provide footage of the incident if possible.

Previously I had given BDSP the benefit of the doubt that the tower trainers simply had "advance access" to Pokemon Home w/r/t movesets relying on transfer moves, such as Heat Wave Zapdos. Now, however, I feel that a discussion is appropriate about the illegality of many Pokemon's movesets and what should be done about it. This is far more widespread and egregious than a simple one-off coding error such as Shell Smash Kommo-o.
 
Last edited:
Now, however, I feel that a discussion is appropriate about the illegality of many Pokemon's movesets and what should be done about it. This is far more widespread and egregious than a simple one-off coding error such as Shell Smash Kommo-o.

Glad to see this brought up!

My take is that we don't have to really do much about it, nor can we really do much about it. This is just the game we choose to play, illegal movesets and all. Current BDSP streaks have already adapted to the BT having transfer-only moves (I think knowing in advance if the opponent has the Zapdos with Heat Wave or the one without it also helps a lot against them) and I think it's only right that we continue playing with the hands we've been dealt.

It's 100% bullshit that the AI gets an advantage that players don't get, but it's a conscious game design choice made for the Tower, rather than something like Shell Smash Kommo-o which was a bug that was immediately patched out. If ILCA was like "hey let's have Infernape-9 with Sacred Fire" or "hey let's have Dewgong-7 with Origin Pulse" it'd suck ass but we have no choice but to adapt and to surmount the odds that are stacked against us. I feel like all we can really do is reword the section of the OP that says AI opponents don't cheat to help newer players hoping to submit streaks in BDSP understand that yeah the AI just kinda has transfer moves it can't normally have and leave it at that. :dewgong:
 
Looking for some advice on my team. I am maxed out at 20 wins and want a conventional team that I can create. Limitations: No legendary dogs, no trade evos.

I have no problem getting mints and changing EVs for any pokes.

I also have a lot of backup competitive pokes: Garchomp, Latios, Heatran, Gyrados, Breloom, Clefable, Togekiss, Dragonite, Raichu, Cresselia & Azumarill

***edit*** I also don't mind breeding for other pokes you may suggest.***

Any and all help would be appreciated


Cloyster:

Skill link/Adamant, 252 Atk/Speed, 4 SplDef

Focus Sash

Icicle Spear/Rock Blast/Razor Shell/Shell Smash


Wash Rotom:

Levitate/Modest, 252 HP/SplAtk, 4 Speed

Sitrus Berry

Discharge/Hydro Pump/Trick/Volt Switch


Tyranitar:

Sand Stream/Adamant, 252 Atk/Speed, 4 SplDef

Lum Berry

Rock Slide/Crunch/Earthquake/Dragon Dance
 
Last edited:
i respect the limitations you're setting on yourself and you have a decent roster of pokes to choose from. the three on your current team all happen to be rather unreliable in the BDSP Tower if you're trying to get more than 49 or 100 wins, however.

the primary issue you have will be dealing with water types, who have very good offensive and defensive weapons against most of your pokes. Cresselia is your best bet to deal with them since most can't really touch her even if they do freeze. Garchomp remains a hilariously reliable pokemon that has okay synergy with a bulky Cresselia.

enemy Weavile is the most immediate threat to Garchomp/Cresselia, and Gyarados does a great job of stopping Weavile with Intimidate.

so I'd suggest a lead Intim DD Chesto Gyarados with Waterfall EQ and Rest, with a Leftovers 252HP/Def Bold Cress with CM, Psychic, Moonlight and Moonblast, with a standard EQ/OR/SD/Sub Jolly Garchomp with Lum (183HP for four Subs) to switch into Elec and Rock moves aimed at Gyara. you should be able to go pretty high if you're checking the movesets on Serebii and playing carefully.
 
It's 100% bullshit that the AI gets an advantage that players don't get, but it's a conscious game design choice made for the Tower, rather than something like Shell Smash Kommo-o which was a bug that was immediately patched out. If ILCA was like "hey let's have Infernape-9 with Sacred Fire" or "hey let's have Dewgong-7 with Origin Pulse" it'd suck ass but we have no choice but to adapt and to surmount the odds that are stacked against us. I feel like all we can really do is reword the section of the OP that says AI opponents don't cheat to help newer players hoping to submit streaks in BDSP understand that yeah the AI just kinda has transfer moves it can't normally have and leave it at that. :dewgong:

Agreed. I ran into an Icy Wind Suicune earlier in Masters Doubles, and I was annoyed that it was able to use it while we can't. Honestly, the part that annoys me most about that is that some Pokemon I'd like to use? I can't, because the moves I want aren't available.

I'll have to set up my Switch to stream it in the future (hopefully my El Gato still works, it hasn't been used in a minute), but I lost at the 25th battle in my first run of Doubles, using Eisenherz's rain team. I got Custap'd by a Bronzong when I only had Raikou left; I looked away for a second and saw that I was back in the Tower's lobby. That one's on me, I had the team up (Ryne & Alton, Ampharos/Poliwrath/Bronzong/Kangaskhan) and failed to see the item on the Bronzong.
 
Last edited:
Back
Top