The one and only goal of this team is to click Last Respects on Basculegion (while Trick Room is active) until you have won the game.
The other 5 mons are merely there to facilitate this goal.
Is it a good team? It's definetly gimmicky, but it also carried me into the Top 100 on Showdown Ubers - so you decide.
PokePaste
Example Battle #1
Example Battle #2
Example Battle #3 (Replaced Sash on Hatterene and Rabsca to great effect)
Example Battle #4
Example Battle #5 (My "Boss Battle" to enter the Top 100)
________________________________________________________________________________________
________________________________________________________________________________________
________________________________________________________________________________________

The Harbinger (Glimmora) @ Focus Sash
Ability: Toxic Debris
Tera Type: Ghost
EVs: 252 SpA / 4 SpD / 252 Spe
Timid Nature
- Mortal Spin
- Mud ShotEarth Power
- Stealth Rock
- Spikes
One of the main concerns of the team is the limited amount of time Trick Room is active for Basculegion - usually only 6 turns per game. A mon with focus sash eats up 2 of these turns instead of one - as well as having a chance to revenge kill Basculegion - so we need Entry Hazards on the team and Glimmora might just be the best Hyper Offense lead to do that.
Stealth Rock and Spikes are self-explanatory to that end. We also really don't like Entry Hazards on our side since we have 3 Sashed Pokemon, so Mortal Spin comes in handy. Finally Earth Power hits a bunch of common threats decently hard and since Momentum is not that important at this stage in the game, I chose to forgoe Memento.
Sash to take at least one hit, Tera Ghost (although you will never click it) to stop Rapid Spin and the EVs to hit as hard as possible with Earth Power and at least speed tie opposing Glimmoras.
Edit: I since replaced Earth Power with Mud Shot since it helps in the Glimmora Mirror.
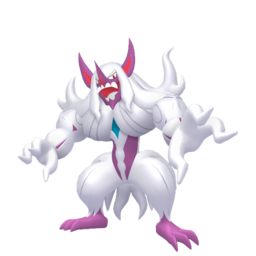
The Initiate (Grimmsnarl) @ Light Clay
Ability: Prankster
Shiny: Yes
Tera Type: Ghost
EVs: 252 HP / 252 Def / 4 SpD
Bold Nature
IVs: 0 Atk
- Reflect
- Light Screen
- Taunt
- Parting Shot
Grimmsnarl is arguably the best screens setter in Uber right now. These screens help Caly-I set up, protect Bascu while Sweeping or help the other mons survive hits if their Sashes get broken. Taunt further helps to keep Entry Hazards off our side of the field and stops Sweepers from setting up on us. From this point on, Momentum is everything for the team and Parting Shot helps to keep it strong while also aiding with the Screens roll - which is why I decided to use it instead of an attacking move.
Light Clay is the only choice for a screens setter and the given EVs help Grimmsnarl survive a +1 Behemoth Blade from Zacian-C. Tere Ghost, which you, again, should never click, for the same reason as above.

The Acolyte (Calyrex-Ice) @ Weakness Policy
Ability: As One (Glastrier)
Level: 99
Tera Type: Fire
EVs: 252 HP / 252 Atk / 4 Def
Brave Nature
IVs: 0 Spe
- Glacial Lance
- High Horsepower
- Trick Room
- Swords Dance
We are allowed to use 6 pokemon and since Bascu maybe can't do everything alone, I decided to put another Sweeper/Wallbreaker here to punch some holes into the enemy team. It is not necessary to run a Trick Room sweeper, but I chose to, because if the Sweeper gets knocked out prematurely, Bascu can swoop in and make use of the remaining Trick Room turns.
And Calyrex-Ice is probably my favourite set-up sweeper in the game, because it is so incredibly difficult to revenge kill while Trick Room is up due to its insane bulk. Another good choice would have been Trick Room Necrozma-DM, but I decided to go for Caly-I, because with its ability unprepared opponents can lose half their team to this beast.
It is a pretty standard set tho: Glacial Lance as an immensly powerful STAB, High Horespower for coverage, Trick Room and Swords Dance to set up. Maximum Attack EVs and the rest into defense. Since it is so incredibly bulky, I use Weakness Policy to intentionally take a super effective hit I know I will survive (especially behind screens) to get more power quicker. Tera Fire to avoid getting Burned. Only ever click this if you are 100% certain you will not need to Tera Fighting on Bascu (more on that later).
The only really spicy thing is Level 99 to ensure I win Speed Ties against opposing Caly-I in Trick Room (you can forgoe this if you want to).

The Priestess (Hatterene) @ Focus Sash
Ability: Magic Bounce
Tera Type: Steel
EVs: 252 HP / 252 Def / 4 SpD
Relaxed Nature
IVs: 0 Atk / 0 Spe
- Misty Explosion
- Healing Wish
- Trick Room
- Reflect
Hatterene sets up the first round of Trick Room for Bascu. Another option could have been Magearna, but Hatterene has the distinct advantage of Magic Bounce. More Anti-Entry Hazard tech, but even more importantly it means that she cannot be Taunted.
Either Misty Explosion or Healing Wish are used to keep up the tempo. Misty hits many common threats very hard, like the cover legendaries, while Healing Wish is especially useful if Bascu has already taken a hit (for example when the Opponent uses Ho-Oh to phaze out Caly-I and it lands on Bascu). Reflect is there because I had 4 move slots to fill and couldn't think of something better. I think I clicked it once on my road to 1500.
Instead of Focus Sash I am actually thinking about running Babiri Berry, which would let me still survive a +1 Zacian-C Attack, but would leaves me more open to Special Attackers.
Besides that, EV spread for maximum Defense and minimal Speed. Tera Steel to get good resits, but once again, you will most likely never click it.

The Undertaker (Rabsca) (M) @ Focus Sash
Ability: Synchronize
Tera Type: Water
EVs: 252 HP / 252 Def / 4 SpD
Relaxed Nature
IVs: 0 Atk / 0 Spe
- Revival Blessing
- Memento
- Trick Room
- Reflect
Rabsca is there to give Bascu a second chance at life - and lucky for us, even tho there are only two mons in the entire game with Revival Blessing, this one has Trick Room too. Truly a no-brainer. Memento is again used to keep up momentum and keep Bascu just that little bit safer. I run Reflect for the same reason as above.
EV spread for maximum defense, Tera Water (which you will also never click) to better take Flare Blitz from Koraidon and finally a Sash to make it all irrelevant anyhow. However, just like with Hatterene I am also thinking of replacing the Sash here with a Mental Herb to guarantee the Trick Room -> Memento against Taunters.
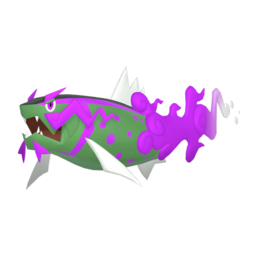
The Grim Reaper (Basculegion) @ Life Orb
Ability: Adaptability
Level: 98
Shiny: Yes
Tera Type: Fighting
EVs: 252 HP / 252 Atk / 4 Def
Brave Nature
IVs: 0 Spe
- Last Respects
- Wave Crash
- Aqua Jet
- Tera Blast
And finally we have arrived. The man, the myth, the legend. Basculegion. The reason this team exists.
One of the few mons that learn Last Respects and of those, the only good one (besides Bascu-F, but you unfortunately cannot run both).
For those who don't know: Last Respects is a ghost type move that gains +50BP for every fainted pokemon on your team. That means 250BP Adaptability STABed goodness on 112 base ATK. And if that wasn't enough, the second time around it's 350BP (becaus funnily enough, Last Respects counts Bascu's own KO). (Almost) nothing survives that, that's not immune to it.
And for those that do survive, we have Wave Crash. Also Adaptability STABed 120BP Water move and the priority Aqua Jet. Aqua Jet is rarely used but when you need it, it is super useful to have. Besides, we have a free slot here anyhow.
Actually more important than these two is Tera Blast Fighting which OHKO's the most common E-Killer Arceus set after Entry Hazards. Don't even think about running anything else or you are gonna lose hard to it - and it's on so many teams. It also beats Kingambit which you would otherwise need Substitute and prediction luck for.
Life Orb for maximum flexibility with maximum firepower. Same with the EV spread. And a spicy Level 98 to be slower than Level 100 Trick Room Necrozma-DM (and other Basculegions) to top it all off. You could even consider running it on Level 96. This would make you slower than a Choice Scarf Ditto that copied your Caly-I. But that might be just a bit too much spice, even for me.
________________________________________________________________________________________
________________________________________________________________________________________
________________________________________________________________________________________
Well, thanks for reading all this and I am looking forward to hear your suggestions!
The other 5 mons are merely there to facilitate this goal.
Is it a good team? It's definetly gimmicky, but it also carried me into the Top 100 on Showdown Ubers - so you decide.
PokePaste
Example Battle #1
Example Battle #2
Example Battle #3 (Replaced Sash on Hatterene and Rabsca to great effect)
Example Battle #4
Example Battle #5 (My "Boss Battle" to enter the Top 100)
________________________________________________________________________________________
________________________________________________________________________________________
________________________________________________________________________________________
The Harbinger (Glimmora) @ Focus Sash
Ability: Toxic Debris
Tera Type: Ghost
EVs: 252 SpA / 4 SpD / 252 Spe
Timid Nature
- Mortal Spin
- Mud Shot
- Stealth Rock
- Spikes
One of the main concerns of the team is the limited amount of time Trick Room is active for Basculegion - usually only 6 turns per game. A mon with focus sash eats up 2 of these turns instead of one - as well as having a chance to revenge kill Basculegion - so we need Entry Hazards on the team and Glimmora might just be the best Hyper Offense lead to do that.
Stealth Rock and Spikes are self-explanatory to that end. We also really don't like Entry Hazards on our side since we have 3 Sashed Pokemon, so Mortal Spin comes in handy. Finally Earth Power hits a bunch of common threats decently hard and since Momentum is not that important at this stage in the game, I chose to forgoe Memento.
Sash to take at least one hit, Tera Ghost (although you will never click it) to stop Rapid Spin and the EVs to hit as hard as possible with Earth Power and at least speed tie opposing Glimmoras.
Edit: I since replaced Earth Power with Mud Shot since it helps in the Glimmora Mirror.
The Initiate (Grimmsnarl) @ Light Clay
Ability: Prankster
Shiny: Yes
Tera Type: Ghost
EVs: 252 HP / 252 Def / 4 SpD
Bold Nature
IVs: 0 Atk
- Reflect
- Light Screen
- Taunt
- Parting Shot
Grimmsnarl is arguably the best screens setter in Uber right now. These screens help Caly-I set up, protect Bascu while Sweeping or help the other mons survive hits if their Sashes get broken. Taunt further helps to keep Entry Hazards off our side of the field and stops Sweepers from setting up on us. From this point on, Momentum is everything for the team and Parting Shot helps to keep it strong while also aiding with the Screens roll - which is why I decided to use it instead of an attacking move.
Light Clay is the only choice for a screens setter and the given EVs help Grimmsnarl survive a +1 Behemoth Blade from Zacian-C. Tere Ghost, which you, again, should never click, for the same reason as above.
The Acolyte (Calyrex-Ice) @ Weakness Policy
Ability: As One (Glastrier)
Level: 99
Tera Type: Fire
EVs: 252 HP / 252 Atk / 4 Def
Brave Nature
IVs: 0 Spe
- Glacial Lance
- High Horsepower
- Trick Room
- Swords Dance
We are allowed to use 6 pokemon and since Bascu maybe can't do everything alone, I decided to put another Sweeper/Wallbreaker here to punch some holes into the enemy team. It is not necessary to run a Trick Room sweeper, but I chose to, because if the Sweeper gets knocked out prematurely, Bascu can swoop in and make use of the remaining Trick Room turns.
And Calyrex-Ice is probably my favourite set-up sweeper in the game, because it is so incredibly difficult to revenge kill while Trick Room is up due to its insane bulk. Another good choice would have been Trick Room Necrozma-DM, but I decided to go for Caly-I, because with its ability unprepared opponents can lose half their team to this beast.
It is a pretty standard set tho: Glacial Lance as an immensly powerful STAB, High Horespower for coverage, Trick Room and Swords Dance to set up. Maximum Attack EVs and the rest into defense. Since it is so incredibly bulky, I use Weakness Policy to intentionally take a super effective hit I know I will survive (especially behind screens) to get more power quicker. Tera Fire to avoid getting Burned. Only ever click this if you are 100% certain you will not need to Tera Fighting on Bascu (more on that later).
The only really spicy thing is Level 99 to ensure I win Speed Ties against opposing Caly-I in Trick Room (you can forgoe this if you want to).
The Priestess (Hatterene) @ Focus Sash
Ability: Magic Bounce
Tera Type: Steel
EVs: 252 HP / 252 Def / 4 SpD
Relaxed Nature
IVs: 0 Atk / 0 Spe
- Misty Explosion
- Healing Wish
- Trick Room
- Reflect
Hatterene sets up the first round of Trick Room for Bascu. Another option could have been Magearna, but Hatterene has the distinct advantage of Magic Bounce. More Anti-Entry Hazard tech, but even more importantly it means that she cannot be Taunted.
Either Misty Explosion or Healing Wish are used to keep up the tempo. Misty hits many common threats very hard, like the cover legendaries, while Healing Wish is especially useful if Bascu has already taken a hit (for example when the Opponent uses Ho-Oh to phaze out Caly-I and it lands on Bascu). Reflect is there because I had 4 move slots to fill and couldn't think of something better. I think I clicked it once on my road to 1500.
Instead of Focus Sash I am actually thinking about running Babiri Berry, which would let me still survive a +1 Zacian-C Attack, but would leaves me more open to Special Attackers.
Besides that, EV spread for maximum Defense and minimal Speed. Tera Steel to get good resits, but once again, you will most likely never click it.
The Undertaker (Rabsca) (M) @ Focus Sash
Ability: Synchronize
Tera Type: Water
EVs: 252 HP / 252 Def / 4 SpD
Relaxed Nature
IVs: 0 Atk / 0 Spe
- Revival Blessing
- Memento
- Trick Room
- Reflect
Rabsca is there to give Bascu a second chance at life - and lucky for us, even tho there are only two mons in the entire game with Revival Blessing, this one has Trick Room too. Truly a no-brainer. Memento is again used to keep up momentum and keep Bascu just that little bit safer. I run Reflect for the same reason as above.
EV spread for maximum defense, Tera Water (which you will also never click) to better take Flare Blitz from Koraidon and finally a Sash to make it all irrelevant anyhow. However, just like with Hatterene I am also thinking of replacing the Sash here with a Mental Herb to guarantee the Trick Room -> Memento against Taunters.
The Grim Reaper (Basculegion) @ Life Orb
Ability: Adaptability
Level: 98
Shiny: Yes
Tera Type: Fighting
EVs: 252 HP / 252 Atk / 4 Def
Brave Nature
IVs: 0 Spe
- Last Respects
- Wave Crash
- Aqua Jet
- Tera Blast
And finally we have arrived. The man, the myth, the legend. Basculegion. The reason this team exists.
One of the few mons that learn Last Respects and of those, the only good one (besides Bascu-F, but you unfortunately cannot run both).
For those who don't know: Last Respects is a ghost type move that gains +50BP for every fainted pokemon on your team. That means 250BP Adaptability STABed goodness on 112 base ATK. And if that wasn't enough, the second time around it's 350BP (becaus funnily enough, Last Respects counts Bascu's own KO). (Almost) nothing survives that, that's not immune to it.
And for those that do survive, we have Wave Crash. Also Adaptability STABed 120BP Water move and the priority Aqua Jet. Aqua Jet is rarely used but when you need it, it is super useful to have. Besides, we have a free slot here anyhow.
Actually more important than these two is Tera Blast Fighting which OHKO's the most common E-Killer Arceus set after Entry Hazards. Don't even think about running anything else or you are gonna lose hard to it - and it's on so many teams. It also beats Kingambit which you would otherwise need Substitute and prediction luck for.
Life Orb for maximum flexibility with maximum firepower. Same with the EV spread. And a spicy Level 98 to be slower than Level 100 Trick Room Necrozma-DM (and other Basculegions) to top it all off. You could even consider running it on Level 96. This would make you slower than a Choice Scarf Ditto that copied your Caly-I. But that might be just a bit too much spice, even for me.
________________________________________________________________________________________
________________________________________________________________________________________
________________________________________________________________________________________
Well, thanks for reading all this and I am looking forward to hear your suggestions!
Attachments
Last edited:


