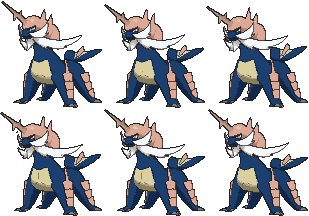





Samurott @ Lum Berry
Ability: Torrent
Shiny: Yes
EVs: 252 Atk / 252 Spe / 4 Def
Adamant Nature
- Swords Dance
- Waterfall
- Aqua Jet
- Megahorn
The king of RU...almost. Samurott has the ability to tear through a lot of the common cores in the current meta after one SD. Its solid natural bulk of 95/85/70 provides ample set-up opportunities versus both stall and offense. Lum Berry allows it to set-up in the face of a wall that can do nothing but Toxic or fish for a Scald burn.
Slowking
+2 252+ Atk Samurott Megahorn vs. 248 HP / 252+ Def Slowking: 396-468 (100.7 - 119%) -- guaranteed OHKO
Tangrowth
+2 252+ Atk Samurott Megahorn vs. 248 HP / 252+ Def Tangrowth: 294-348 (72.9 - 86.3%) -- guaranteed 2HKO after Leftovers recovery
Mega-Steelix
+2 252+ Atk Samurott Waterfall vs. 252 HP / 0 Def Mega Steelix: 228-270 (64.4 - 76.2%) -- guaranteed 2HKO
Mega-Abomasnow
+2 252+ Atk Samurott Megahorn vs. 172 HP / 0 Def Mega Abomasnow: 458-540 (125.8 - 148.3%) -- guaranteed OHKO
Aromatisse
+2 252+ Atk Samurott Waterfall vs. 252 HP / 252+ Def Aromatisse: 211-250 (51.9 - 61.5%) -- 96.9% chance to 2HKO after Leftovers recovery
0 SpA Aromatisse Moonblast vs. 32 HP / 0 SpD Samurott: 136-162 (40.1 - 47.7%) -- guaranteed 3HKO
Jolteon
+2 252+ Atk Samurott Aqua Jet vs. 0 HP / 4 Def Jolteon: 180-213 (66.4 - 78.5%) -- guaranteed 2HKO
Hitmonlee
+2 252+ Atk Samurott Aqua Jet vs. 0 HP / 4 Def Hitmonlee: 198-234 (82.1 - 97%) -- guaranteed 2HKO
252+ Atk Life Orb Hitmonlee Mach Punch vs. 32 HP / 0 Def Samurott: 101-121 (29.7 - 35.6%) -- 24.6% chance to 3HKO
Fletchinder
+2 252+ Atk Samurott Aqua Jet vs. 152 HP / 0 Def Fletchinder: 386-456 (127.3 - 150.4%) -- guaranteed OHKO
252+ Atk Samurott Aqua Jet vs. 152 HP / 0 Def Fletchinder: 194-230 (64 - 75.9%) -- guaranteed 2HKO
252+ Atk Fletchinder Acrobatics (110 BP) vs. 32 HP / 0 Def Samurott: 154-183 (45.4 - 53.9%) -- 44.1% chance to 2HKO
Flygon
+2 252+ Atk Samurott Aqua Jet vs. 0 HP / 0 Def Flygon: 144-171 (47.8 - 56.8%) -- 88.3% chance to 2HKO
+2 252+ Atk Samurott Waterfall vs. 0 HP / 0 Def Flygon: 288-339 (95.6 - 112.6%) -- 75% chance to OHKO
252 Atk Flygon Outrage vs. 32 HP / 0 Def Samurott: 187-222 (55.1 - 65.4%) -- guaranteed 2HKO
Emboar
+2 252+ Atk Samurott Aqua Jet vs. 0 HP / 4 Def Emboar: 338-398 (93.6 - 110.2%) -- 62.5% chance to OHKO

Fletchinder
Ability: Gale Wings
Shiny: Yes
EVs: 128 HP / 252 Atk / 128 Spe
Adamant Nature
- Swords Dance
- Acrobatics
- Will-O-Wisp
- Roost
I'm not sure what can be said about Fletchinder that isn't already known. As I referenced above, its an incredible revenge killer for offensive teams because of its 110 BP priority move. Without Fletchinder, 'mons like Hitmonlee and Virizion would run through this team with relative ease. The speed EV's reach a speed stat of 236, which is designed to give a decent buffer of speed difference versus other Fletchinder while maintaining an odd HP number. Fletchinder operates as the primary revenge killer, Virizion check, and potential set-up sweeper.

Virizion @ Lum Berry
Ability: Justified
EVs: 252 Atk / 4 SpD / 252 Spe
Jolly Nature
- Swords Dance
- Close Combat
- Leaf Blade
- Zen Headbutt
SD Virizion completes the trio of SD sweepers and also completes a FWG core along with Samurott and Fletchinder. SD Virizion, like Samurott, is a 'mon that can threaten both stall and offense thanks to its great natural bulk vs. stall and its top-tier speed vs. offense. The only options for SD Virizion are the item and the coverage move; we opted for Lum Berry to allow us to set-up on status-reliant walls and Zen Headbutt because Amoonguss is a big defensive threat for this team and it also hits Golbat for super effective damage. SD Virizion is our best answer to the annoying jellyfish that hinders Samurott's ability to sweep a team. It acts as set-up fodder for Virizion (with Lum Berry still in-tact) and becomes more of a liability for the opponent than anything. While both Samurott and Virizion can tear through the common "Water/Grass/M-Steelix" core, Samurott is better for variations including Slowking and/or Tangrowth, while Virizion fares better versus Alomomola/Amoonguss. The point? You have multiple options for tearing through one of the better defensive cores in the RU metagame. You can never be upset with options. EV's are standard.
Alomomola+2 252 Atk Virizion Leaf Blade vs. 120 HP / 136 Def Alomomola: 470-554 (93.8 - 110.5%) -- 62.5% chance to OHKO
Amoonguss
+2 252 Atk Virizion Zen Headbutt vs. 252 HP / 160+ Def Amoonguss: 272-320 (62.9 - 74%) -- guaranteed 2HKO after Black Sludge recovery
0 SpA Amoonguss Sludge Bomb vs. 4 HP / 0 SpD Virizion: 134-162 (41.3 - 50%) -- 0.4% chance to 2HKO
Mega-Steelix
+2 252 Atk Virizion Close Combat vs. 252 HP / 0 Def Mega Steelix: 290-344 (81.9 - 97.1%) -- guaranteed 2HKO
Slowking
+2 252 Atk Virizion Leaf Blade vs. 248 HP / 252+ Def Slowking: 380-450 (96.6 - 114.5%) -- 81.3% chance to OHKO
Jellicent
+2 252 Atk Virizion Leaf Blade vs. 252 HP / 0 Def Jellicent: 612-722 (151.4 - 178.7%) -- guaranteed OHKO

Hitmonlee @ Life Orb
Ability: Reckless
EVs: 252 Atk / 4 Def / 252 Spe
Adamant Nature
-
- High Jump Kick
- Knock Off
- Mach Punch
Opting for Sucker Punch over Bulk Up in order to deal with fast offensive Psychic types. This is the 'mon that I'm sure will receive a lot of funny looks and perhaps a lot of disagreement. And I completely understand if that's the case. Bulk Up Hitmonlee more than likely seems like a gimmick set due to its terrible bulk that provides it no set-up opportunities. But what does provide it set-up opportunities is the amount of switches (and protects...stupid fish) that Hitmonlee forces. While its not always plausible, it is extremely effective in the event that it has the opportunity to get a +1 (and it happens more than you may think.) While it was originally used to punish stall, it also gives a great boost to Mach Punch that allows it to beat faster but frailer offensive 'mons. While the boost to defense might seem pointless, it allows Hitmonlee to tank (lol) certain priority moves that would otherwise ruin its fun (calcs listed below). Overlooking the different set, Hitmonlee does what it always has: beats up stall and revenges weakened offensive 'mons with Mach Punch. It's incredibly effective at what it does and there really isn't much more to explain. EV's are standard.
Slowking (Bulk Up on switch from threatened 'mon such as M-Lix)
+1 252+ Atk Life Orb Hitmonlee Knock Off (97.5 BP) vs. 248 HP / 252+ Def Slowking: 356-421 (90.5 - 107.1%) -- 43.8% chance to OHKO
Tangrowth
+1 252+ Atk Life Orb Reckless Hitmonlee High Jump Kick vs. 132 HP / 0 Def Tangrowth: 425-500 (113.6 - 133.6%) -- guaranteed OHKO
Alomomola (Bulk Up on predicted Protect)
+1 252+ Atk Life Orb Reckless Hitmonlee High Jump Kick vs. 120 HP / 136 Def Alomomola: 528-621 (105.3 - 123.9%) -- guaranteed OHKO
Spiritomb (Bulk Up on switch from threatened 'mon)
+1 252+ Atk Life Orb Hitmonlee Knock Off (97.5 BP) vs. 212 HP / 0 Def Spiritomb: 200-237 (68 - 80.6%) -- guaranteed 2HKO
Hitmonlee normally fails to 2HKO after knocking off the item. Now it has that opportunity, although it comes at the cost of taking the potential burn. It's a give/take situation.
Jolteon
+1 252+ Atk Life Orb Hitmonlee Mach Punch vs. 0 HP / 4 Def Jolteon: 199-235 (73.4 - 86.7%) -- guaranteed 2HKO
Mega-Glalie
+1 252+ Atk Life Orb Hitmonlee Mach Punch vs. 0 HP / 0 Def Mega Glalie: 320-377 (106.3 - 125.2%) -- guaranteed OHKO
252 Atk Mega Glalie Ice Shard vs. +1 0 HP / 4 Def Hitmonlee: 69-82 (28.6 - 34%) -- 1.2% chance to 3HKO
Houndoom
4 Atk Life Orb Houndoom Sucker Punch vs. +1 0 HP / 4 Def Hitmonlee: 57-68 (23.6 - 28.2%) -- 88.1% chance to 4HKO
Samurott
252+ Atk Life Orb Samurott Aqua Jet vs. +1 0 HP / 4 Def Hitmonlee: 87-103 (36 - 42.7%) -- guaranteed 3HKO
Hitmonlee
+1 252+ Atk Life Orb Hitmonlee Mach Punch vs. 0 HP / 4 Def Hitmonlee: 220-259 (91.2 - 107.4%) -- 43.8% chance to OHKO
252+ Atk Life Orb Hitmonlee Mach Punch vs. +1 0 HP / 4 Def Hitmonlee: 99-117 (41 - 48.5%) -- guaranteed 3HKO
Mega-Abomasnow
252+ Atk Mega Abomasnow Ice Shard vs. +1 0 HP / 4 Def Hitmonlee: 81-96 (33.6 - 39.8%) -- guaranteed 3HKO after hail damage

Flygon @ Life Orb
Ability: Levitate
Shiny: Yes
EVs: 252 SpA / 4 SpD / 252 Spe
Timid Nature
- Draco Meteor
- Earth Power
- Fire Blast
- Defog
This is nothing more than the standard offensive defog set. It's a fast defogger that also offers some offensive capability and useful resistances. More often than not, Flygon is used to control hazards and weaken checks to our primary sweepers, even if it means sacrificing itself in the process. He is more often than not the first 'mon to die, but never in vain. EV's are standard.

Steelix @ Steelixite
Ability: Sturdy
EVs: 248 HP / 96 Atk / 164 SpD
Adamant Nature
- Stealth Rock
- Heavy Slam
- Earthquake
- Stone Edge
The SpD investment allows Mega-Steelix to better check threats such as Exploud, Sigilyph and Meloetta while still OHKO'ing Tyrantrum and Mega-Glalie. Mega-Steelix provides two things that all offensive teams need: a Fletchinder counter and a Tyrantrum check. In order to maintain the offensive nature of the team and punishing switch-ins who expect the Specially Defensive set, I've opted for max Attack instead. The 8 Spe EV's are simply for outspeeding opposing M-Steelix. I opt for Stone Edge over Roar or Toxic because it OHKO's Fletchinder while burned. Stone Edge is what turns M-Lix into a hard Fletchinder counter as opposed to set-up fodder.
Fletchinder
252+ Atk burned Mega Steelix Stone Edge vs. 152 HP / 0 Def Fletchinder: 376-444 (124 - 146.5%) -- guaranteed OHKO
252+ Atk burned Mega Steelix Stone Edge vs. 152 HP / 0 Def Fletchinder: 376-444 (124 - 146.5%) -- guaranteed OHKO
Offensive Threats:
Scarf Tyrantrum: This shouldn't be any sort of surprise. The prime reason for its suspect is that it hinders offensive teambuilding. That being said, it can be revenge killed by the combination of Hitmonlee and Samurott and Mega-Steelix provides a few switch-ins. The priority is to get off as much chip damage as possible in order to ensure the Mach Punch KO with Hitmonlee. It's not ideal, but that's what Tyrantrum does.
Specs Meloetta: Another surprise I'm sure. Meloetta is guaranteed a KO each time it enters the match assuming correct prediction. Even non-specs offensive sets are capable of tearing through most offensive teams, including this one. The one thing working in our favor is our 3 strong physical priority moves, all of which hit neutrally, going against Meloetta's low Defense stat. Also, Virizion outspeeds and can deal a fair amount of damage while tanking 1 hit (excluding Psychic) from the specs set.
Defensive Threats:
Very few! Obviously this isn't entirely true, as any well-played stall team is going to give you a tough time, but the synergy between our SD 'mons allows us to break a lot of the strong defensive cores in the current RU meta. The most important thing is to evaluate which 'mons you'll need in order to break through certain opposing defensive 'mons. We lack a cleric, so simple mistakes (switching into status post-Lum, for example) can make or break a game versus a defensive-oriented team.
Samurott @ Lum Berry
Ability: Torrent
Shiny: Yes
EVs: 252 Atk / 4 Def / 252 Spe
Adamant Nature
- Swords Dance
- Waterfall
- Aqua Jet
- Megahorn
Fletchinder
Ability: Gale Wings
Shiny: Yes
EVs: 128 HP / 252 Atk / 128 Spe
Adamant Nature
- Swords Dance
- Acrobatics
- Will-O-Wisp
- Roost
Virizion @ Lum Berry
Ability: Justified
EVs: 252 Atk / 4 SpD / 252 Spe
Jolly Nature
- Swords Dance
- Close Combat
- Leaf Blade
- Zen Headbutt
Hitmonlee @ Life Orb
Ability: Reckless
EVs: 252 Atk / 4 Def / 252 Spe
Adamant Nature
- High Jump Kick
- Mach Punch
- Knock Off
- Sucker Punch
Flygon @ Life Orb
Ability: Levitate
Shiny: Yes
EVs: 252 SpA / 4 SpD / 252 Spe
Timid Nature
- Draco Meteor
- Earth Power
- Fire Blast
- Defog
Steelix @ Steelixite
Ability: Sturdy
EVs: 248 HP / 96 Atk / 164 SpD
Adamant Nature
- Stealth Rock
- Heavy Slam
- Earthquake
- Stone Edge
Thank you for taking the time to read/rate! I hope that this team serves you well in your quest to receive req's for the current suspect test! Please feel free to share any opinions/recommendations for the team and any experiences that you've had while using it that may help other players. Offensive teams offer little room for error and any additional advice/suggestions could be a huge help for a newer player trying to get more involved in the RU tier or in Showdown in general.
Replay vs. Stall (only decent display of the team I could find): http://replay.pokemonshowdown.com/rususpecttest-297896296
Last edited:


