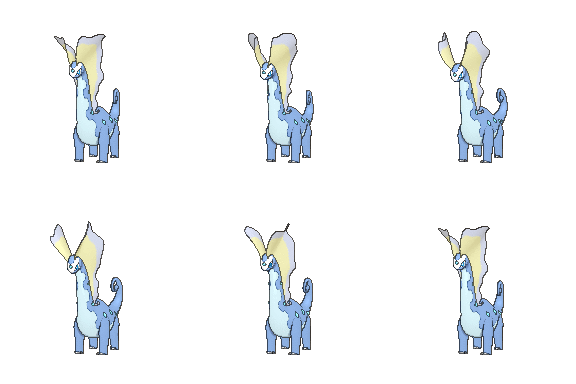
Challenge Pokemon Sun Aurorus Solo

20140523162756!Aurorus_XY.gif


Aurorus is one of my favorite Gen 6 Pokemon – everyone goes gaga over the Tyrantrum line, but Aurorus is way cooler (and also based off the coolest dinosaur). It uh, also kind of sucks, especially for something with 521 BST. Aurorus is slow and has several common weaknesses (most notably 2 4x weaknesses to Fighting and Steel) – not exactly a winning combination. So what better way to use it than by itself, amplifying those flaws? Yeah, I'm not one to shy away from a challenge in Pokemon, as you can probably tell. At least Aurorus does have a ton of offensive and set-up options. So I got an Amaura egg (a direct descendant of the Amaura I used in my Untrained NFE Run) to prepare for this run.

First things first, though - the starter. I decided to pick Litten. This is actually a pretty difficult choice, as starter affects a lot of things in this game. Litten gives Ilima’s Smeargle Water Gun (fine), Hau Rowlet (trivial) and Vaporeon (much less so), Gladion Water Silvally (this doesn’t really matter, honestly), and Kukui Primarina. Kukui is the main issue, as he’s both by far the hardest and too late to grind to some important benchmark (namely evolution). I think Incineroar is the worst option – it’s bulky, resists ice, and has Cross Chop. Even though it’s weak to Rock, Aurorus has much worse rock options than ice ones. Decidueye is easy to KO, but has speed EVs and has a super-effective Z-move. Primarina was what I thought would be the middle option – it still destroys Aurorus and is harder to kill as well, but it’s slow. From how things ended up I’d say Primarina was actually the easiest option, but even as a challenge glutton I can safely say I’m fine with having the easiest Kukui fight, because goddamn that fight sucks for Aurorus.

Back to our adventure - once I got to the first Pokemon Center, I traded over the Amaura egg. Amaura has a Normal resistance and is pretty strong with its STAB Powder Snow, so it starts off well. It doesn’t take long to run into a snag though – Teacher Emily at the Trainer’s School has a Magnemite. Truthfully, I don’t like this fight even casually, as Magnemite is a stupidly obnoxious Pokemon this early on that invalidates a lot of available Pokemon. While her Magnemite doesn’t have any Steel moves, Thunder Shock is still neutral and a straight up brawl with Powder Snow leaves Amaura with too few HP to deal with Meowth afterwards. There’s really nothing to be done here – I don’t like using in-battle items, but it was either that or grind to level 13 for Icy Wind. I opted for the much quicker route and just used a Potion. Thankfully, it was the last time in this playthrough I needed to use an in-battle item.

On to Hau’oli City, home to the greatest TM – Echoed Voice. A 40 BP move that keeps gaining 40 BP for successive uses is amazing this early in the game, and it’s particularly absurd on Amaura. Because of Refrigerate, it also gets a 20% power boost and STAB. Let’s just say this gets a ton of usage throughout this playthough.

The first victim? Ilima. He starts with Yungoos, which is easy bait to start getting Echoed Voice rolling. Smeargle does decent damage with Water Gun, but it’s not enough to save it. Later comes the Totem Gumshoos which doesn’t fare much better – it gets 2HKOd by Echoed Voice. Hau in the meadow meets the same fate. Where’d the challenge go?

Oh yeah, Amaura has crippling 4x weaknesses and I’m about to go toe-to-toe with 3 EV-trained Pokemon that can exploit that. That’s where the challenge went. I got to Hala at level 18, and needless to say it didn’t go well. I could survive one Fighting move (except Crabrawler’s Z move). My initial plan was to take a Karate Chop from Mankey, Echoed Voice it, then quickly ninja kill it with another Quick Claw Echoed Voice. Crabrawler was OHKOd, but even a 192 BP Echoed Voice wasn’t enough to down Makuhita with its Thick Fat and max special defense EVs. The key here was something I’d forgot for a bit – even with Refrigerate, normal moves remain normal with a Z-crystal. And Amaura has a really powerful one this early in Take Down, which is a 175 BP Z-move that wastes Makuhita.

The issue then was getting to Makuhita without the Quick Claw. I realized that I could KO Mankey without the Quick Claw by using Icy Wind first to lower its speed and damage it, then finish it with Echoed Voice. The problem is that this meant Echoed Voice was only at its second turn for Crabrawler, which couldn’t OHKO it without a crit, though it was close. So I opted to grind a bit. While I try to minimize grinding partially for challenge purposes, I also do it because grinding’s pretty bad in this game for a solo challenge – scaling is terrible when you’re overleveled by default. Once I got to 21, I had a 50% chance of the t2 Echoed Voice OHKOing Crabrawler. I grinded up to that in the meadow, which took ~20 minutes even without animations. With the extra levels, I was able to execute my planned strategy on the 2nd attempt, and became victorious on what I anticipated to be one of the biggest roadblocks. Go Amaura!

Anyways, that's all I'm going to write for now. As I alluded to earlier I've already completed this run, but I'll probably just post write-ups island-by-island to keep things more manageable.
 
I always dig hearing about/seeing solo runs with weird, kind of weak or hard to use pokemon. Very interested how you handle some of the later challenges like Salazzle
 
I always dig hearing about/seeing solo runs with weird, kind of weak or hard to use pokemon. Very interested how you handle some of the later challenges like Salazzle

Flame Burst isn't even super-effective and a rock/ground-type move would strike pretty hard? Faster mons with fighting (and steel, but those aren't as common) type moves are uber bad news for this challenge though.
 
Flame Burst isn't even super-effective and a rock/ground-type move would strike pretty hard? Faster mons with fighting (and steel, but those aren't as common) type moves are uber bad news for this challenge though.
I actually did forget Aurorus only takes neutral damage against flame burst
Guess Salazzle will probably be the easiest of the Akala totems, then.
 
I actually did forget Aurorus only takes neutral damage against flame burst
Guess Salazzle will probably be the easiest of the Akala totems, then.
Yeah, Salazzle is definitely the easiest of the Akala totems. But honestly, the totems in general weren't too bad compared to the typical boss trainers.
 
Alright, time to get back into this. Before I headed into Akala Island, I did the optional Ilima fight back at his house, though it wasn’t really worth bothering with. Gumshoos still only attacks with Normal moves so Echoed Voice has no problems getting going. I also made sure to get the Round TM from the Hau’oli Mall, which with Refrigerate is a drawback-less 72 BP STAB option. Moving on to Akala, two very important TMs are available at the mart – Reflect and Light Screen. Having the option to reduce incoming damage is a godsend when you’re weak to everything. I was quickly greeted by Dexio, who has a Slowpoke and Espeon. I set up a Light Screen before spamming Echoed Voice. It ran out by the time Espeon came out, but Slowpoke didn't deal enough damage for Espeon to finish me off before it got nuked by Echoed Voice. Gladion didn't put up much of a fight either – Type: Null is a pretty beastly Pokemon for this stage of the game, but it’s one of those fleeting moments where Amaura’s typing is defensively useful.

Totem Wishiwashi and Salazzle

The first totem is Wishiwashi. This actually went a lot easier than I expected – Charge Beam is available right before this, and provided I got the boost I could cleanly 2HKO it while surviving its Water Gun. Now, it still wouldn’t be that easy because the little Wishiwashi it summons could pick me off with Brine the turn I KOd the totem with this method, but… it just didn't. It uses Aqua Ring instead. I reset a few times to make sure this wasn’t a fluke occurrence, but it seems the minion always spends the first turn using Aqua Ring. Hey, I’ll take it! Not too often the Pokemon world is kind to Amaura. Totem Salazzle is next. I learned Ancient Power while on the mountain while also picking up the Rock Tomb TM, so I had good options on both ends to hit all the Pokemon in this trial. Marowak got destroyed by Ancient Power, Magmar and Salazzle by Rock Tomb. Rock Tomb didn't OHKO Salazzle, but with the speed drop Amaura is faster the next turn so it’s pretty easy.

On the way to the dreaded Totem Lurantis, I made sure to fight all the trainers on Route 5 so I could get the Nature Power TM from the route boss. This includes some double battles, which apparently aren’t fightable if you’re soloing. So I took Litten out of the box (lowkey the best part of soloing SM – you can actually solo without needing HM slaves) to “help”. Yeah, let’s call it that.

Totem Lurantis

Now for Lurantis. On the bright side, Amaura hits this thing pretty hard, so its obnoxious Synthesis spam isn’t an issue. But it’s still a faster Pokemon with super-effective STAB. The first immediate issue was that it could whip out a Solar Blade ASAP with its Power Herb. To my shock, I actually survived this sometimes, but it wasn’t helpful since I couldn’t OHKO it back. But, it was pretty easy to force Lurantis to waste the Power Herb by using Protect. While this meant I didn’t get a turn to attack Lurantis without an ally, this didn’t end up mattering because Icy Wind is a spread move that can weaken Lurantis for a third while OHKOing the Trumbreak… sometimes. This part was a little inconsistent, so I grinded a level (31->32) to make it better. With the Power Herb out of the way, Lurantis usually uses Razor Leaf to attack (Solar Blade can just be Protected if it’s seen again anyways), which Amaura could survive two of. Castform came out the next turn, but I KOd Lurantis with Take Down the same turn so it couldn't cause any shenanigans with Sunny Day. I used a Wiki Berry (one of the newly buffed healing berries that heals 50% when <25%) to gain back enough health to take the recoil from Take Down. Castform actually used Water Gun instead of Sunny Day, but it’s very weak and I had plenty of health to take them. Castform went down in two hits afterwards.

Up to this point, I’d been fighting all the trainers I saw, but getting up to Olivia definitely showed that sometimes discretion is the better part of valor. The Diglett’s Cave boss has a Hariyama with a Fighting Z-move, and there’s also a Black Belt with Hariyama right before Tapu Lele’s ruins. Hala’s Makuhita was annoying enough – these just weren't worth the effort. With an Emergency Exit in place, I moved onto Plumeria. Armed with just a Golbat and Salandit, she’s trivial.

Olivia

Lastly, we finish Akala Island at Level 34 with Olivia’s Grand Trial. Normally this is rather anticlimactic as at least one of the Totems is harder, but here it definitely lives up to its name. There are two rather big issues here. First, Lycanroc outspeeds and OHKOs Amaura with Continental Crush if I charge in without protection. Second, her Boldore has Sturdy, which means it’s virtually impossible not to take a hit from it (I had the idea of setting up Hail beforehand and using Protect when it came in, but I just didn’t have the moveslots to make this work), and it uses Rock Blast which can potentially be up to a 125 BP move. Trying to survive a 5-hit Rock Blast in tandem with everything else just wasn’t going to happen, so I had to hope I didn’t see it. The one big upside to this fight is that Olivia rather stupidly fights on the grass, which means Nature Power becomes Energy Ball (even if you’re playing casually, this is really useful to know).

Since Lycanroc is faster, I initially thought I had to find a way to survive Continental Crush. Between Reflect and the newly available Eviolite, this isn’t hard, but I just couldn’t find a way to take that, damage from Nosepass, and even a small Rock Blast from Boldore. I also pretty much had to use the normal Z-Crystal (which triggers Bloom Doom with Nature Power) to OHKO Lycanroc, which meant I only had Reflect to mitigate damage. The tantalizing thing about this was that the Rock Polish TM was just around the corner, and as long as I could outspeed Lycanroc, the fight would be way easier. If only…

Ah, but wait! Once again I’d forgotten about a crucial aspect of Z-moves – status Z-moves. I checked the Z-move list to see if I had access to any speed boosts, and not only did I, but serendipitously it was attached to a move I’d already been using to block Nosepass’s Thunder Wave – Safeguard. With that revelation, this got a lot easier. While this meant I couldn’t use Bloom Doom on Lycanroc, the added flexibility in setting up on Nosepass gave me time to get to +1 with Charge Beam and OHKO Lycanroc with Nature Power. As before, I used Reflect to help set up. Unfortunately, Charge Beam into Nature Power didn’t KO Nosepass, making it take an extra turn which meant that Reflect would wear off when Boldore came out. I remedied this by using the first Charge Beam before Reflect, so while I took a little more damage, I still had Reflect for Boldore. With this set-up, Nosepass took me down to ~40% (1 normal Rock Slide and 2 halved by Reflect), and Lycanroc was outsped and OHKO’d. Boldore would need a 5-hit Rock Blast to KO me (or a 4-hit with good rolls), but it only got a 3 hit, and Amaura KOd it the next turn. This is pretty favorable – multi-hit moves are actually biased towards the lower end.

And that’s Akala Island basically done! Despite the obvious reason to think Hala would be harder, I spent a lot more time thinking of how to beat Olivia. Funny how that worked out.
 
I dig your strategies for these, I think this is the first time iv'e seen people (successfully) use a status z move strategy in-game
 
I’ve been going island by island, but for this update I think I’m going to do the last two islands together. Poni Island is pretty short and uninteresting and can’t really support its own update.

Kiawe and Lana

So, before heading onto Ula’Ula Island I fought the Akala trial captains, Kiawe and Lana. For whatever reason Kiawe/Mallow are version-exclusive fights, which I find pretty silly. Because I had to forget Ancient Power for Olivia (and the move relearner is at the end of the game), rock moves actually weren’t ideal here because I got Intimidated turn 1 by Growlithe, and Rock Tomb then couldn’t outpace Marowak’s Bonemerang. It ended up being better to set up some Charge Beams and sweep with Tri Attack (from Nature Power). Lana also wasn't too bad despite being a Water-specialist – Safeguard blocked Chinchou’s Thunder Wave, and it got 2HKOd be Rock Tomb. Once Chinchou was gone Lana fell quickly – Araquanid was OHKOd by Continental Crush, and Shellder by Charge Beam.

Hau

After a mysterious encounter with Nihilego, I fought Hau in Malie City. While his starter was trivial (Dartrix), the Vaporeon he chose to counter my Litten was a big issue. It's special bulk is ridiculous for an unevolved Pokemon to deal with. I ended up using Eviolite and Light Screen to reduce the damage as much as possible. His Raichu only dealt a third with Psychic, and a sixth after Light Screen, while I 2HKOd it with Echoed Voice. This left me with enough health to take two Water Pulses from Vaporeon while I barely 3HKOd it with a barrage of 144, 192, and 240 BP Echoed Voices. Dartrix fainted 8 times over from the last Echoed Voice.

The first thing I did in Ula’Ula Island was buy the all-important Rock Polish TM from the mart. Being able to raise speed was invaluable to avoid hits from the myriad of Pokemon that hit me super-effective. Another huge buff for Amaura came on the way to Mt. Hokulani – it finally evolves into Aurorus! And once I got to the top of the mountain, I could finally buy vitamins. I bought 5 Calciums and 4 Irons before maxing out my EVs. I wanted to buy more, but at least those were definitely the stats I needed the most. All these buffs just in time for…

Molayne

A Steel-type boss. Steel is by far the worst type for Aurorus to deal with. Beyond the 4x Steel weakness, Aurorus has no good way to hit Steel-types. On the bright side, Molayne was probably the worst Steel-type boss there could be. Two of his Pokemon didn't even resist Ice, and nothing had a move stronger than 50 BP. So he was only fairly difficult as opposed to being a nightmare. Metang was the one thing that resists Ice, and with max special defense EVs it was pretty obnoxious to deal with given how little time there was to set up. The trick here was to use the Metronome item. This is pretty easy to miss, as you get it in the Hano Resort that most players have Faba immediately whisk them away from. Metronome gives you successively larger boosts when repeatedly using the same move. Sound familiar? Yeah, this works like a dream with Echoed Voice. I set up Rock Polish on Skarmory, then 2HKOd it with Echoed Voice. Dugtrio and Metang (which took a 192 BP Echoed Voice with a x1.6 multiplier) were then both OHKOd by Echoed Voice. Surviving the Steel moves was a bit iffy – I took two Metal Claws from Skarmory, and a Bullet Punch from Metang. The total damage of these moves ranged from 152-176, compared to my 162 HP. But I survived them on the first attempt I used Metronome, so I rolled with it.

From here, things cooled down for a while. Totem Vikavolt was a joke and got OHKOd by Continental Crush, while Guzma’s team was OHKOd by Freeze Dry and Psychic. Totem Mimikyu put up a bit more of a fight, but nothing too bad. Echoed Voice+Metronome makes a return. I broke the Disguise turn 1 with Echoed Voice, KOd Haunter the next turn with Echoed Voice, then OHKOd Mimikyu the next turn with 144 BP Echoed Voice with x1.4 multiplier. Aurorus didn’t have any trouble taking 3 Play Roughs from Mimikyu. Plumeria, the second Guzma fight, and Gladion were all pretty trivial. Nanu didn’t fare much better, but since he’s a Kahuna I’ll still summarize the fight. I Encored Sableye’s Fake Out, though this was more for flair rather than necessity. I set up a Rock Polish and then ran through his team with Freeze-Dry. Persian survived but couldn’t do much back.

Aether Paradise (Lusamine)

Back into Aether Paradise. Aurorus dominated all the grunts, and even Guzma’s last stand didn’t put up a fight. Everything was OHKOd. Golisopod (Freeze Dry), Pinsir (Rock Slide), Masquerain (Freeze Dry) and Ariados (Psychic), and only Masquerain was faster. Lusamine also wasn’t too bad, though not quite as trivial. Since I can boost both special attack and speed, an easy set-up opportunity generally translates into an easy sweep now. The only wrinkle is that part of Lusamine’s AI is advanced enough to switch. The specific trigger for this is using a move that one of her other Pokemon is resistant to. Because I needed to use Charge Beam to boost special attack, I ran the risk of Lilligant switching in. I didn’t need that much set up – Rock Polish could be safely set up without fear of a switch, and I only needed to get to +2 with Charge Beam. In fact, even if Lusamine switches Lilligant in, if both Charge Beams get the boost it wouldn't even matter. But on my first attempt she switched to Lilligant and I failed to get one of the boosts. If I wasn’t at +2 I failed to OHKO Milotic and Mismagius, so I attempted to set up another Charge Beam on Lilligant, only to get Teeter Danced and then Stun Spored. So the next time I used Z-Safeguard to boost my speed instead, so that if the same situation happened I wouldn’t get statused to death, and could instead barely survive a Petal Dance. Normally I wouldn’t bother with that level of optimization, but when each attempt at Lusamine takes 3 minutes to even get to the fight, consistency is key.

Anyways, one last thing to get before heading to Poni Island – the Return TM from the Malie Malasada Shop. This didn’t really get much use in important fights, but for general use it was a 122 BP STAB which was really useful for normal trainer battles. At Poni Island, I bought a number of the TMs available, but the important ones ended up being Calm Mind and Hyper Beam. I got some of the type-resist berries in Poni Plains, and was fortunate enough to get both Babiri (Steel) and Chople (Fighting) berries. Hapu had a scary lead in max attack Dugtrio with Iron Head, but I survived with the Babiri Berry and easily swept her team after using Rock Polish.

Vast Poni Canyon had a number of fighting types, but Hyper Beam dealt with them. The biggest issue was actually a Magnezone, but fortunately I remembered the trainer that had it and taught Bulldoze ahead of time. I only 2HKOd, but that was enough since it didn’t OHKO back. The last Totem is Kommo-o, whose Fighting type would be a major issue, but it’s also a Dragon. I could easily survive Sky Uppercut by using the Chople Berry, but I was lucky to get it so I wanted to conserve it. So, I went with the time-tested classic bullshit strategy of Quick Claw. All I needed was a 20% proc, and I could destroy Kommo-o with Hyper Beam. It's basically karma for the all the broken dreams Quick Claw has caused in the battle facilities all these years.

Lusamine’s jellyfish makeover didn’t really do her any favors. Because I was using setting up with Calm Mind now, I didn’t have to worry about her switching. Additionally, the Frost Breath TM made it easy to break through Clefable’s special defense boosts. And while her Mismagius now needed 2 Rock Polishes to be outsped, I had ample time to set those up. So this honestly ended up being easier than the first time.

While the end of the island challenge was a bit underwhelming, tune in for the endgame, where things definitely heat back up again!
 
And now for Aurorus's rocky endgame...

Well, rocky after Gladion, anyways. He was a pretty typical Rock Polish and sweep battle. His only possible threat, Lucario, was easily vanquished by Nature Power, which is Earth Power in these icy mountains for whatever reason. His Water Silvally was able to survive a Freeze-Dry, but despite super-effective STAB it was still pretty weak.

Hau

Now we're getting somewhere. In addition to his obnoxious Vaporeon from last time, Hau has added another threat in Komala. Komala isn’t quite as bulky, but with max HP EVs, 95 Special Defense and no weakness to exploit, it’s still annoying to deal with and fires back a very strong Wood Hammer. And what really exacerbates this is that his Raichu lead now has Focus Blast, giving virtually no set-up time.

First, his Vaporeon had max speed EVs and outsped Aurorus by 1 point, so I went and grinded a level (63->64) to overcome this. I also used the Flame Orb from Ula’Ula Meadow to get myself burned before the fight. Fortunately, Aurorus’s good bulk came through and I didn’t need any assistance to survive Raichu's Focus Blast, though it took most of my health. I used a Wiki Berry to get back health to prevent the burn from KOing me. I OHKOd Raichu back with Façade, which is ridiculously strong with Refrigerate. Komala was outsped and OHKOd by Façade, and that was one of Hau’s big threats eliminated.

Vaporeon required a shift in strategy, though. Even with the burn slowly wittling away my health, I barely survived a Hydro Pump after using Light Screen, and Rested afterwards. The one upside of endgame-level moves is that they often only have 5 PP – usually more of a hindrance for the player, but plenty exploitable versus the AI too. With Light Screen up, Hydro Pump only did around a quarter, so harmless enough to stall out 5 PP. Once I finished doing that, Vaporeon was completely harmless. The first time around I 2HKOd it with Freeze-Dry, but I ran into a rather embarrassing issue. Vaporeon likes to use Charm, so when Decidueye came out I failed to OHKO it (Freeze Dry is weak) and got OHKOd by Bloom Doom. So next time I used Echoed Voice after neutering Vaporeon despite it being slower so I could destroy Decidueye when it came out.

Kahili and Acerola

Now for the Elite Four. Kahili was a little harder than expected, because she leads with a max attack/speed Skarmory with Sturdy. After barely surviving its Steel Wing (and getting half my health back from Wiki Berry), I used Rock Tomb to break Sturdy and lower its speed to finish it off with Ice Beam next turn. After that, Mandibuzz got 2HKOd by Ice Beam and used Brave Bird. It has Bone Rush, but the AI is really bad at realizing how strong multi-hit moves are. Toucannon came out afterwards (fortunately with no Brick Break), and from there I set up Rock Polish and OHKOd the rest of her team. Acerola was actually easier than Kahili – 3/5 of her team is weak to Ice. Armed with a Persim Berry to prevent Confuse Ray, Aurorus fears nothing on her team.

Olivia

Olivia definitely wasn’t as bad at the first time, but her team is annoyingly bulky. Nothing has offensive EVs except Relicanth, which is specially oriented for reasons unknown. While it had Yawn, with Safeguard I could safely set up Calm Mind, even against its STAB Hydro Pumps, because I mean come on it’s a special Relicanth. I only had room for one attacking move though, so I used Flash Cannon for the best overall coverage. I set up to +3, and OHKOd Relicanth and Lycanroc. Now, Probopass was a huge pain to actually KO. Besides having max HP/special defense investment, it liked to use Sandstorm to further boost it. I had to renew Safeguard to block Thunder Wave, which I then Encored. To my surprise the AI was smart enough to realize it was completely neutered and switched to Carbink, which I Flash Cannoned on the way in. Once Probopass came back, I attacked it for half of its health while it Sandstormed. The boost prevented a 2HKO, so I Encored it and forced another switch, this time to Golem. Again I Flash Cannoned on the way in, which it survived with Sturdy. Olivia spammed a few Full Restores, but this was beneficial since it stalled out her own Sandstorm. Dealing with Golem like this also meant I didn’t have to take a hit from it. Once Probopass came back in I finished it off with Flash Cannon.

Hala

Hala, on the other hand, was much worse than the first time. He leads with Hariyama, which is brutally unfair for Aurorus. It has Thick Fat, max attack/special defense investment, and a ridiculously strong move in Close Combat. He also has Poliwrath, which is similar, though noticeably weaker. And there’s also Primeape, which outspeeds me and hits with similar force. Fortunately, Aurorus has Psychic, and Bewear and Crabominable are non-issues. But regardless, being level 66 wasn’t going to be enough for this fight. I dumped all the Rare Candies I’d gotten throughout the game to get up to level 76 and went to fight against Hala.

Even then, Hala proved to be formidable. Psychic still only did ~70% while Close Combat OHKOd back. The obvious solution, then, was to use Psychium Z for… Z-Reflect?! Z-Reflect grants a very important defense boost, in addition to Reflect’s half damage. With these, Close Combat only did 40%. By sprinkling in Protects and a Rest at the end, I stalled out Hariyama’s Close Combat PP, leaving it with only Knock Off to hurt me with. Unfortunately, I couldn’t capitalize on this as much as I would’ve wanted, because I didn’t have the moveslots to set up any other stat boosts. Still, I made sure to renew Reflect before OHKOing Hariyama with Psychic (courtesy of the CC defense drops).

Crabominable was OHKOd by Psychic, and then Primeape came in. I took around a third from Cross Chop (leaving me with around a third from that and Hariyama’s repeated Knock Offs), and OHKOd with Psychic. Bewear offered no resistance, except wasting a crucial turn that cause Reflect to wear off before Poliwrath came in. Without it, I couldn’t survive Submission nor could I OHKO it with Psychic, so I had to renew Reflect and Rest up. With Reflect and the defense boosts, I could barely take 3 Submissions as I slept. But because of the Submission recoil, I was able to finish it off with Psychic once I woke up.

Kukui

Despite not having a mono-Fighting team, Kukui’s arguably worse than Hala. This is because of two Pokemon – Magnezone and Snorlax. Magnezone is incredibly awful. No matter how much I set up, I can’t OHKO it due to Sturdy, and without any protection it OHKOs with Flash Cannon. And even if I can survive Flash Cannon, it likes to use Thunder Wave. Snorlax also sucks. With max HP and special defense in tandem with Thick Fat, it’s ridiculously hard to break through. And it also has Heavy Slam, though fortunately it’s only 60 BP versus Aurorus. All 3 starters are also problematic, though I’d definitely say I ended up with the easiest option with Primarina. And he leads with a max attack Lycanroc, thwarting early set-up attempts.

Well, in theory, anyways. But realistically, setting up here was my only real hope. The only other vaguely passable strategy I thought of was to use Red Card or Roar to force in Ninetales turn 1. To make a long story short, there was no way this could work with only 4 moveslots, even ignoring how dumb banking on a 1/5 chance to even get started is. So, back to Lycanroc. Stone Edge is yet another endgame move with 5 PP, so that was my in. Stalling it out was simple enough – it only did a little over half, so if I used Reflect and then Rest, the last of its PP would be drained right as I woke up. Unlike Vaporeon and Hariyama, though, Lycanroc isn’t harmless without its main move. Accelrock still does solid damage (around 25% without Reflect), and can hit me for full damage in between Reflects. This wouldn’t be too bad, except Kukui likes to use Crunch sometimes. This is either Kukui being really dumb about how types work, or he’s just being really smart and realizes Crunch is actually the greatest threat. Defense drops early on in set-up are fatal, taking more than one is fatal, and taking only one is still likely fatal.

Given that I needed Rest to heal (and thus risk 3 more defense drops), set-up needed to be minimized. After stalling out Stone Edge, I immediately used Rest again as I only had ~20% HP left. Three turns for defense drops so far. After waking up, I immediately used Reflect again, then used Calm Mind twice, which would be the extent of my set-up. I used Rest again, then OHKOd Lycanroc with Echoed Voice when I woke up. In total this was 10 turns I risked defense drops. I’d estimate it used Crunch half the time which combined with a 20% defense drop makes setting up here pretty sketchy, but there’s really no way around it. A defense drop right at the end was really the only passable time to get one

Magnezone came in first. Because I was at +2 special defense, Flash Cannon wouldn’t KO so it opted for Thunder Wave instead, which I negated with a Cheri Berry. At +2, Magnezone was KOd by the t2 and t3 Echoed Voices. In came Snorlax. Even with a t4 Echoed Voice (192 BP STAB) at +2, Snorlax took only half and retaliated with Heavy Slam. This was why defense drops were so dangerous. But without any, Aurorus survived with ~20% left. Primarina came out, but was OHKOd by max Echoed Voice at +2. It actually has Aqua Jet, but fortunately I was just out of kill range from that. Ninetales came in next, but at +2 special defense it failed to finish me off with Dazzling Gleam as I used Rest. It tickled me a bit as I slept, and then I restarted Echoed Voice which 2HKOd it. Braviary is last, but only offers a resisted (truly the rarest words in Aurorus’s life) Brave Bird as Echoed Voice annihilated it.

And with that, Aurorus is the champion of Alola! Well I mean, technically we were before fighting Kukui, but whatever. This was definitely a fun little solo. Aurorus has a pretty unique combination of strengths and weaknesses that makes it run into lots of issues, but also have a lot of options in how it approaches those issues. Anyways, if you enjoyed my thousands of words about in-game challenge nerdery, you should probably check out my Untrained NFE Run I did in X last year, too.

Thanks for reading!
 
Very enjoyable read. Loved all the innovative strats (particularly the use of z-status moves) to get around amaura/aurorus's disadvantages. Nice to see echoed voice make a come back in the end as the move that pretty much started it all for amaura to have your playthrough come full circle in a way. I did read your X no exp NFE playthrough liked the starts you used there too and how a few of the pokemon you picked up earlier got some use down the road. Looking forward to any runs you might post in the future.
 
Back
Top